Bill Entry
Bill Entry
Overview
Use this option to manually enter an AP Bill that is due and payable to a vendor. Other parts of the system will generate AP Bills as part of the process, such as posting a driver settlement for a subcontractor, or processing a Ticket Payable for a material supplier.
There is generally no need to Print an AP Bill. AP Bills must be Posted tocomplete the process. You may do this individually for each AP Bill,or use the Bills Batch Posting option to post multiple AP Bills.
Start Screen Location - Main Menu > Accounts Payable > Bill Entry
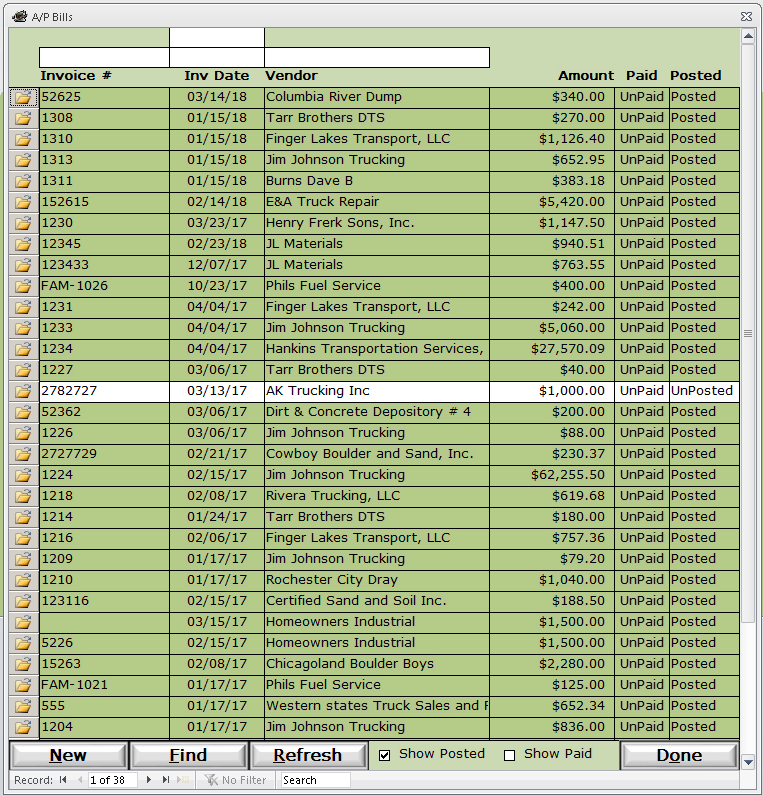
Use this start screen to view your settlements for any date range, with checkbox filters to show, or not show Paid and Posted AP bills.
Click on the Open Folder icon to open an existing AP Bill.
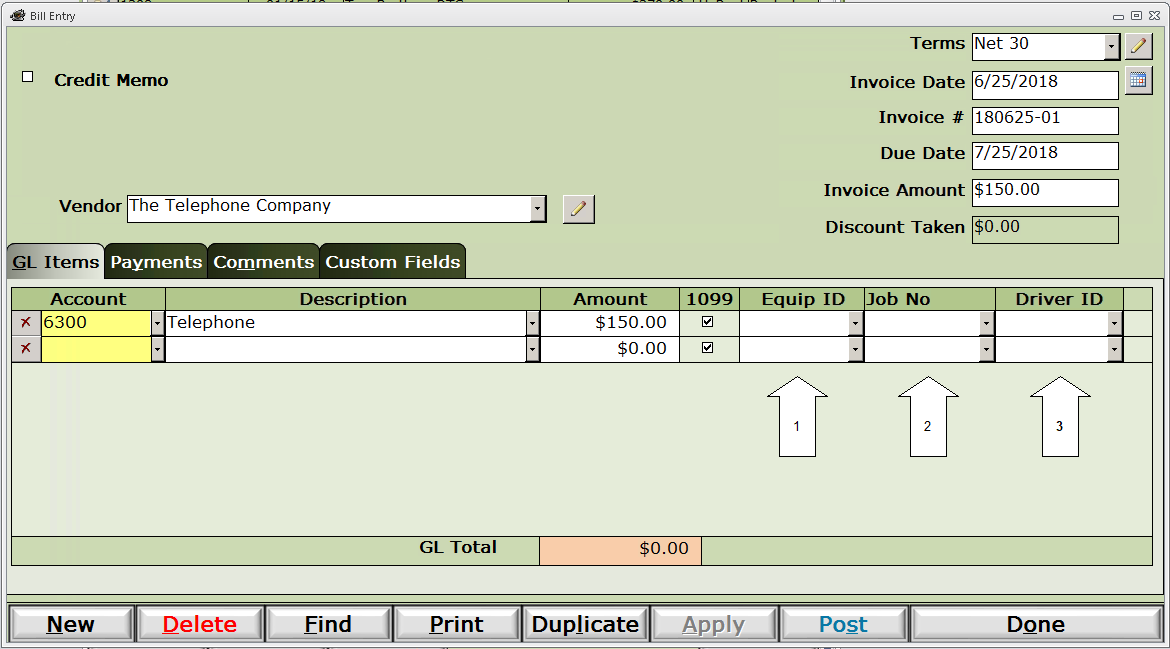
Credit Memo - Check this box if this is a credit to you from your vendor.
Terms - Select the payment terms for this AP Bill. This can come automatically from the Vendor Entry if set up. Terms will determine the Due Date based on the Invoice Date.
Invoice Date - This the date to begin aging the AP Bill. Some will use the date the vendor has marked it. Some will use the date they received the bill. Also, keep in mind that this date determines which Financial Period your bill expenses will be posted to. Once entered, the Due date will automatically be calculated if the Terms have been selected.
Invoice # - While this field can be left blank, it is best to always enter a unique value in this field. In the case of a statement (i.e. telephone bill) that may not contain a specific invoice no., you may want to create a number using the date (i.e. 180625-01).
Due Date - If not calculated automatically based on the Invoice Date and Terms, enter the date this bill is due to be paid.
Invoice Amount - Enter full amount due.
Discount Taken - This field is system generated, at the time of the payment, based on the Discount Days from the Terms and the day you are paying. For example, if your terms are 2% 10 Net 30, then a 2% discount will be calculated and taken if the bill is paid within 10 days, otherwise it is due in full within 30 days.
GL Items tab - Select one or more expense accounts from either the Account dropdown, or the Description dropdown if you want to select the account by name. You may distribute the full Invoice Amount into an unlimited number of smaller portions. For example, if you want to break up a repair bill between parts expense, and labor expense, you might have 2 different entries.
1099 - Checked if this item should be counted toward a 1099 amount for this vendor. This is generally checked by default.
1-Equip ID - Select an equipment ID if this distribution amount should be counted toward the expense of this equipment. For example, if this is a repair invoice, and the invoice is for 2 different trucks, then you may want to allocate the amounts of the bill for each truck on different distribution lines. Each line would have it's own equipment ID. This expense would then appear on the Equipment Profit & Loss report for those equipment IDs.

2-Job No - Similarly, you may attribute AP Bill expense to one or more Jobs.
3-Driver ID - Drivers, usually subcontractors, might be charged with some or all of an AP Bill. Break the portion the driver is responsible for and select the driver in the Driver ID column. Once the AP Bill is posted, the amount for that driver will now appear in the Deductions tab of the Drivers file as an advance. This advance can now be deducted from a future Driver Settlement. For example, if you paid a repair bill for one of your subcontractors, then you can select the charge as a driver advance for the selected driver.

Payments tab - This will display the list of payments made toward this AP Bill. Payments are made from either the Pay Bills or the Payable Check Run options.

Paid - This checkbox will automatically be checked once the AP Bill is paid in full.
Delete button - You may delete a payment if the following conditions are met. 1) The Paid checkbox above is unchecked, and 2) the payment is not in a closed Financial Period.
Pay button - Click to launch the Pay Bills option to pay this bill by check, adjustment or credit card.
Open folder - Click to open the transaction that paid this bill. If a check paid, then the Check Writer option will show the check. If the bill was paid by EFT, then a Bank Adjustment will show.
NOTE: The remaining fields are all system maintained and may not be edited manually.
Comments tab - Enter a comment associated with this AP Bill.
Custom Fields tab - See Custom Fields for more information.