Company Setup
Company Setup
Screen Location - Main Menu > Setup > Company Setup
Overview
The Company Setup module is the central location for configuring company-wide settings in HaulWare. It controls company information, invoicing preferences, General Ledger defaults, messaging, custom fields, and system switches. Changes made here affect the entire system.
Main Company Setup Tab
This tab contains basic company information and divisions.

Key Elements:
- Company Code, Name, Slogan
- Contacts (Invoice & PO)
- Address and Contact Information
- FEIN, MC Number
- Company Logo Path
- Divisions: Define operational divisions (Eastern, Western, etc.)
Sales/Invoicing Tab
Configures invoice numbering, processing rules, salespersons, payment terms, and related settings.
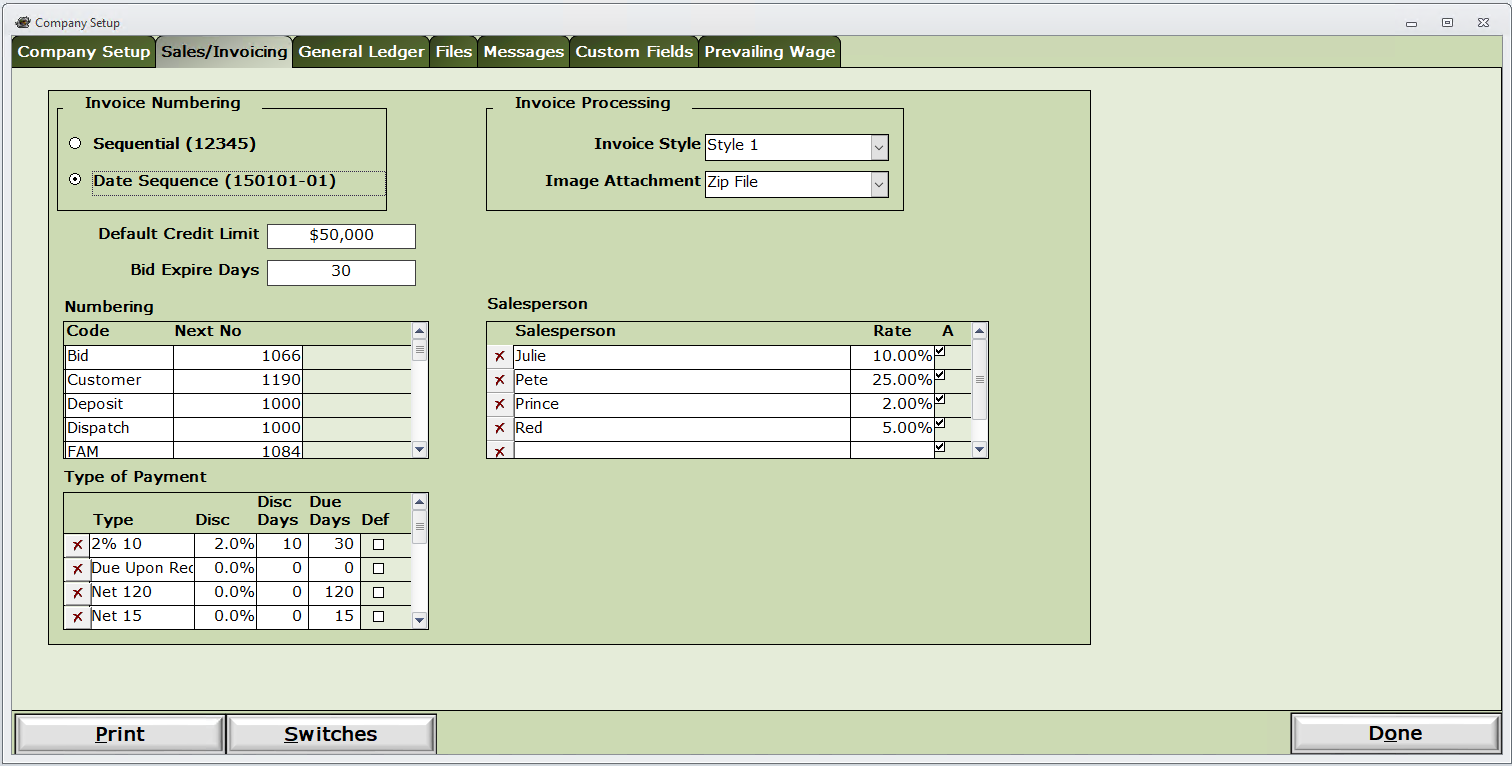
Key Elements:
- Invoice Numbering (Sequential or Date-based)
- Default Credit Limit and Bid Expire Days
- Next Numbering sequences (Bid, Customer, etc.)
- Salesperson rates and commissions
- Type of Payment terms (discounts, due days)
General Ledger Tab
Defines default General Ledger accounts for various transaction types.
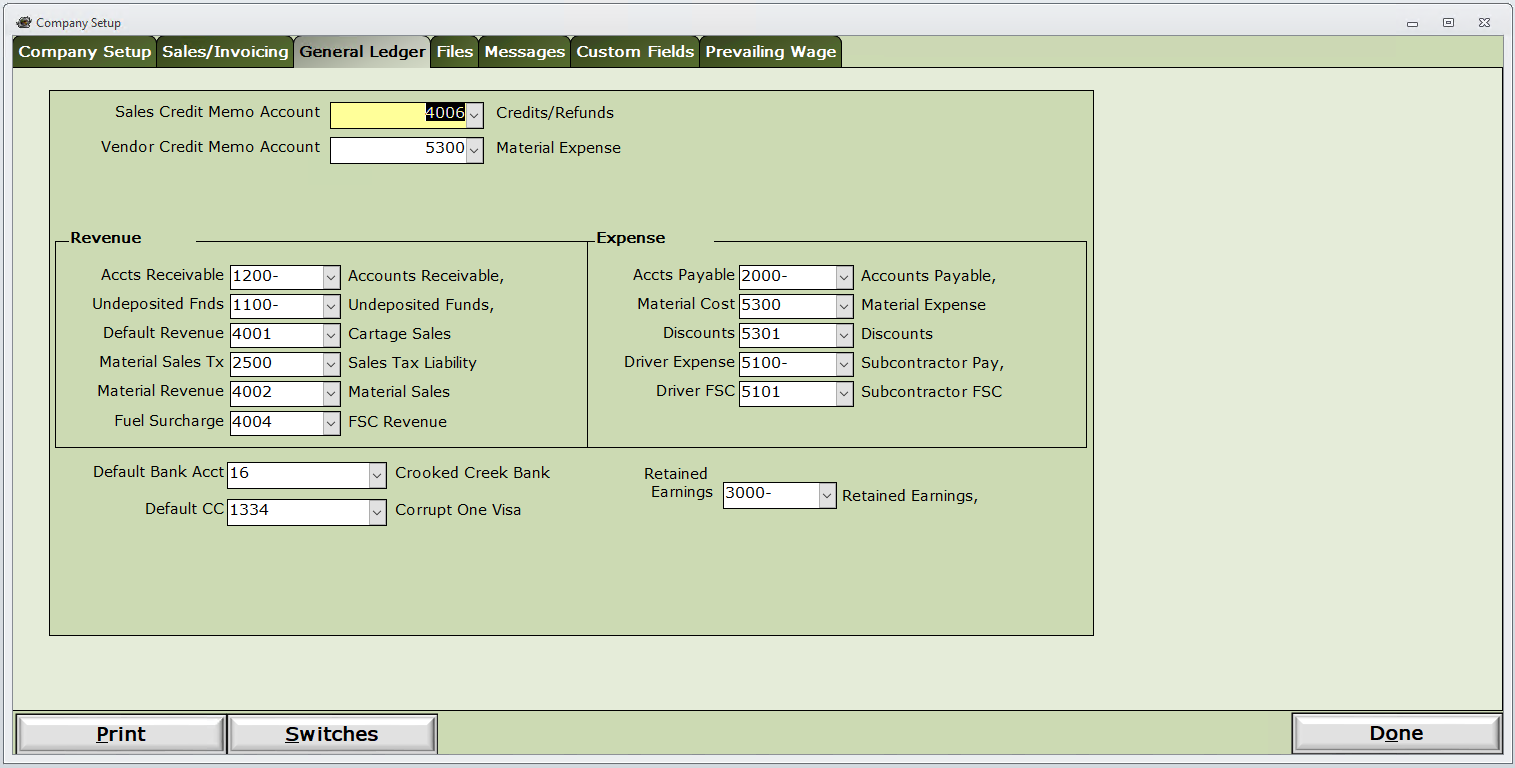
Key Elements:
- Default accounts for Revenue, Expense, Accounts Receivable, Payable, etc.
- Credit Memo accounts
- Default Bank Account and Retained Earnings
Files, Messages, and Custom Fields Tabs
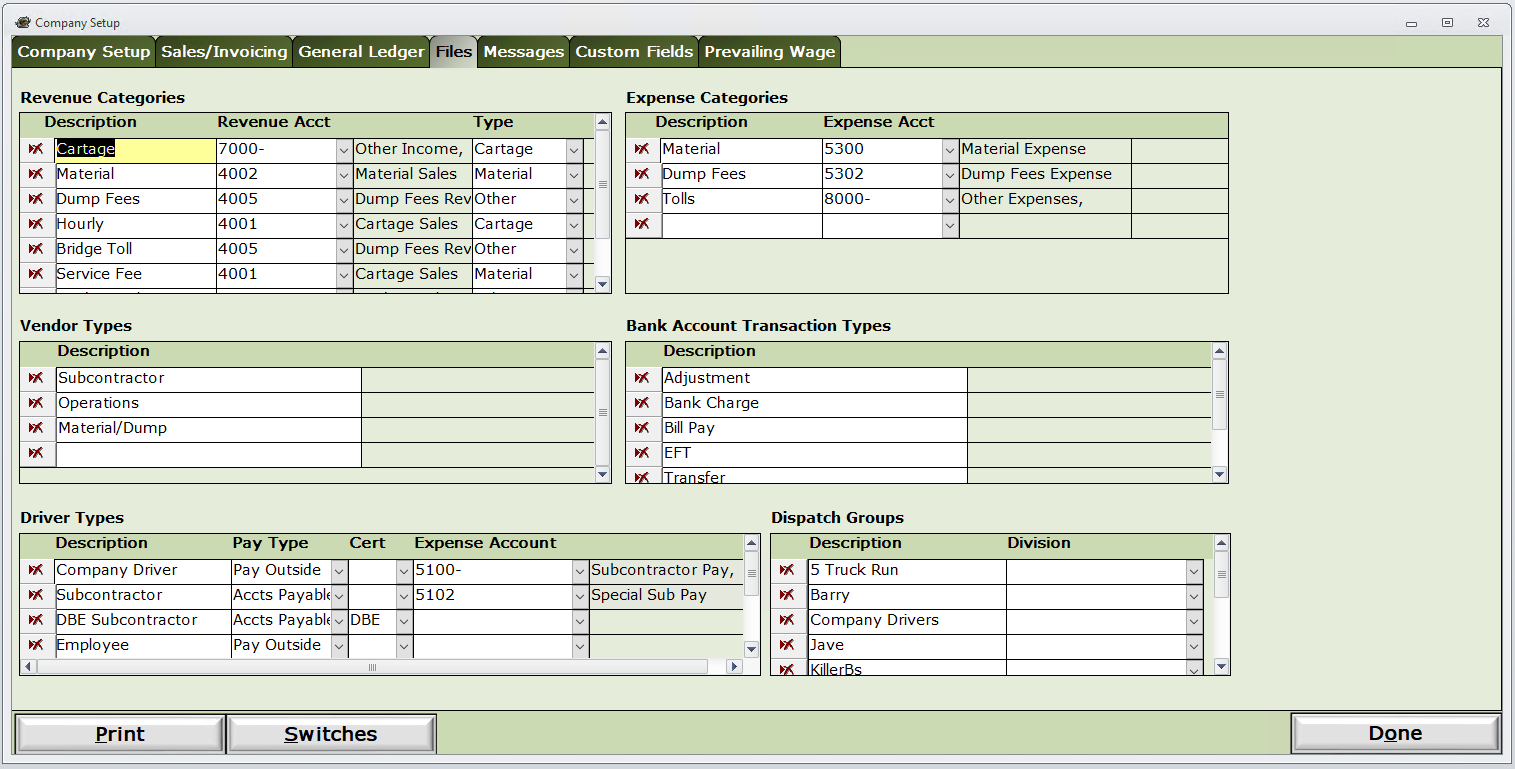
Files Tab: Manages file attachment and document storage settings.
Messages Tab: Configures default messages printed on invoices and settlement documents.
Custom Fields Tab: Allows definition of user-defined custom fields for various modules (Jobs, Tickets, Customers, etc.). This is used to capture additional data specific to your business needs.
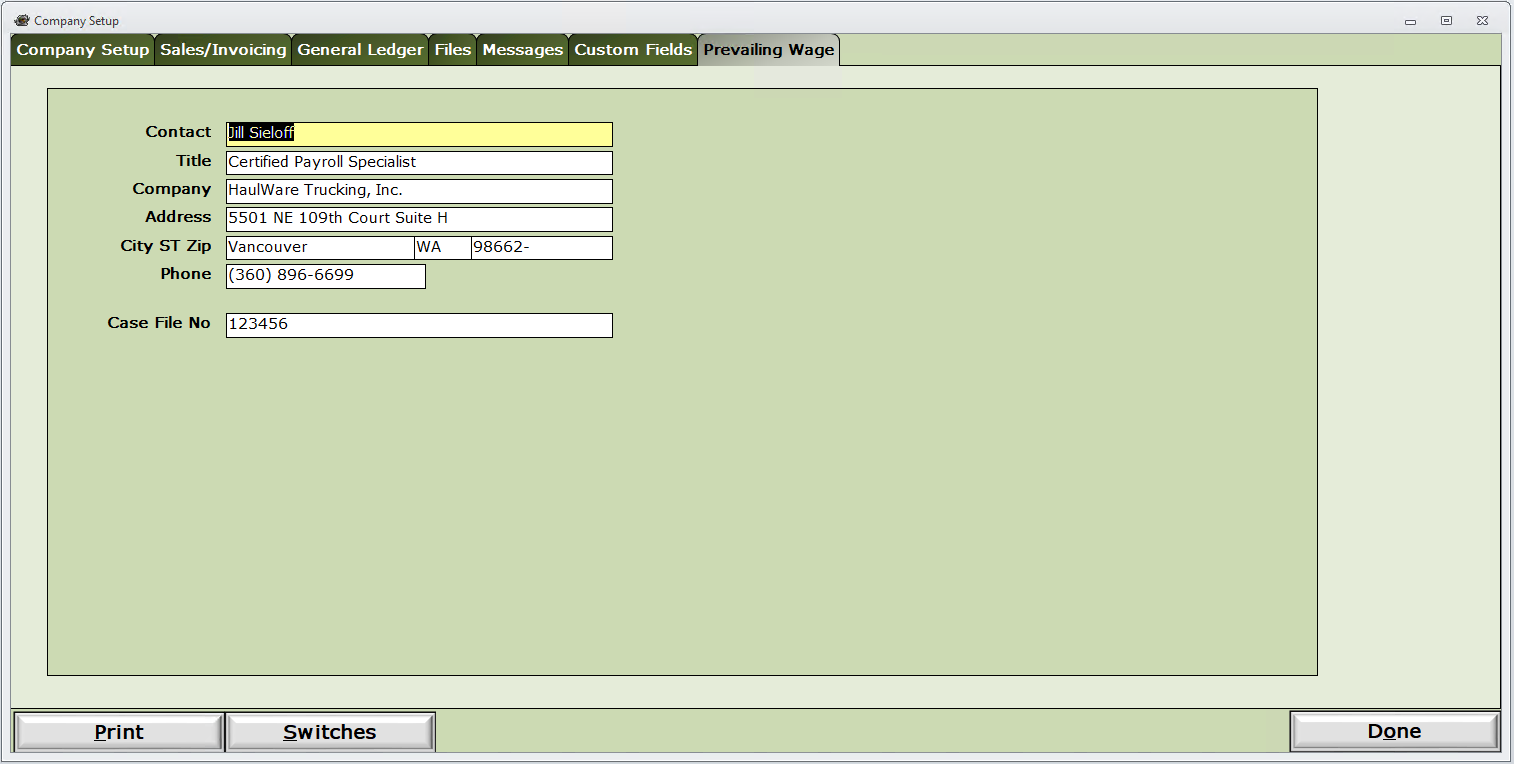
Prevailing Wage Tab
Configures settings related to prevailing wage jobs, certifications, and driver/employee types.
Key Elements:
- Revenue and Expense Categories
- Vendor Types
- Bank Account Transaction Types
- Driver Types and Pay Settings
- Dispatch Groups
Switches (System Configuration)
Accessed by clicking the Switches button at the bottom of the Company Setup screen. This advanced screen controls hundreds of system behaviors and feature toggles.
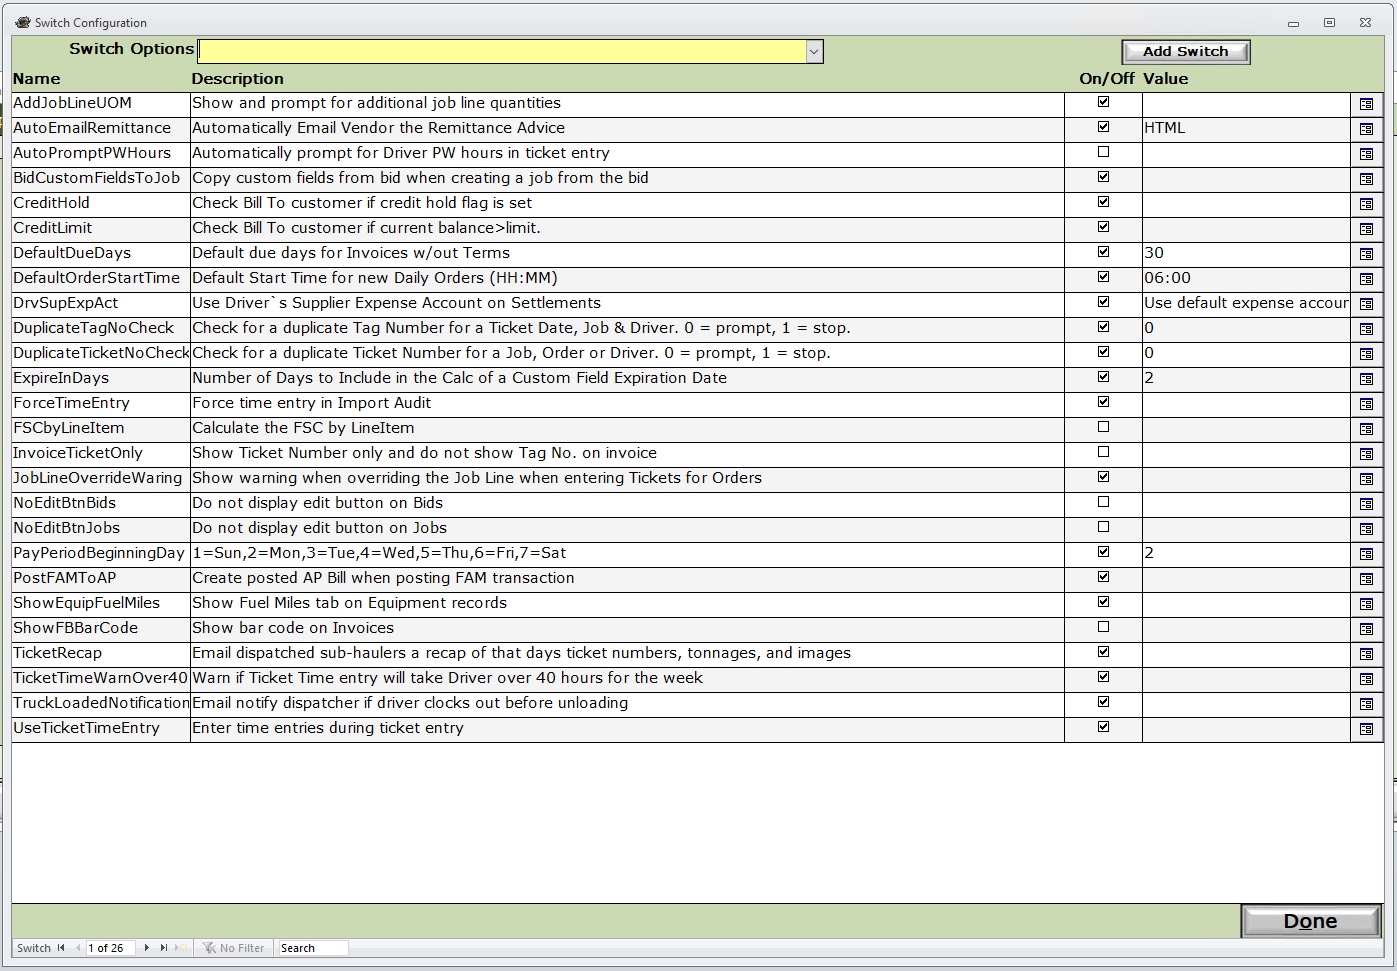
Key Elements:
- Switch Name and Description
- On/Off Value or specific configuration values
- Search and filter capabilities
How to Access
- Navigate to the main menu and select Company Setup.
- Click Switches for advanced system options.
- Click Done to save and exit.
Common Uses
- Updating company contact and address information.
- Configuring GL account defaults when setting up a new company.
- Customizing invoice formats and messages.
- Defining revenue/expense categories and driver types.
- Enabling or disabling system features via Switches.
Tips
- Always document changes made to Switches for future reference.
Please call or Email us for Information on this topic.