Creating a Bid
Bids
9 views
Mar 18, 2026
Updated Sep 01, 2026
Bids
Screen Location: Main Menu > Operations > Bids
- Double click on the menu item Bids to open the start screen. The Bids start screen displays the last 500 records entered.
- Sort the start screen by clicking on the column headings.
- Filter the start screen by entering a value in the field above the column headings.
- Open an existing bid by clicking on the open file folder to the left of the record.
- Begin a new Bid by Clicking the New button.
- Exit the Bid start screen by clicking Done.
Entering a new Bid
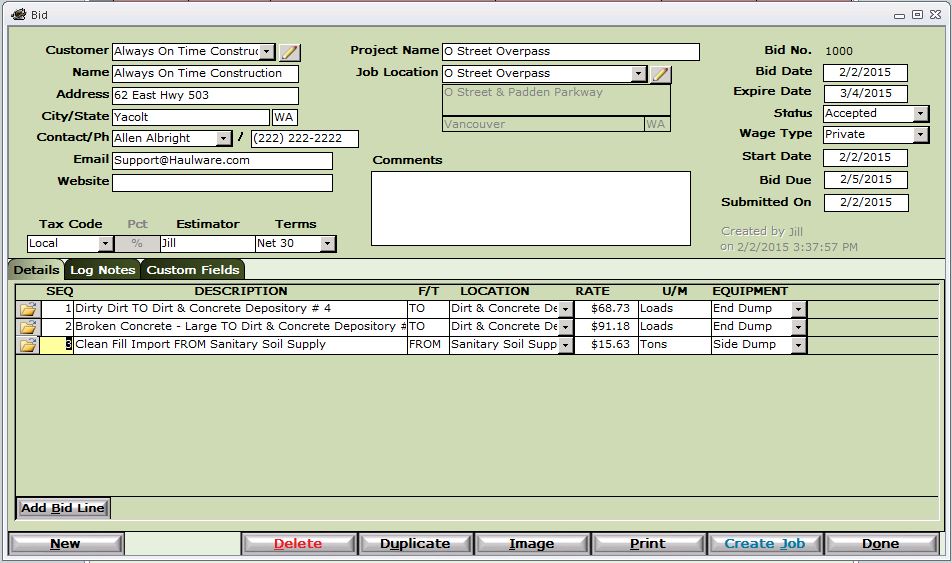
- Customer - If the Bid is for an exiting customer you may choose the customer from the drop down or utilize the auto fill by beginning to enter the customer name. If the bid is for a new customer and you want create them, click on the pencil button next to the customer field. The Customer file window will pop up and the customer can be created without leaving the Bid screen.
- Note - Entering the customer is optional but will need to be entered before the Bid can be converted to a Job.
- Tax Code - If sales tax will apply to any items on the Bid, choose the Tax Code from the drop down.
- Note - Tax codes and rate are entered in Setup > Company Setup > Sales and Invoicing Tab.
- Estimator - The Estimator field is defaulted to the user name but can be overridden.
- Terms - The terms are defaulted from the Customer file but can be overridden to reflect specific terms for this Bid.
- Note - Bid specific terms will be carried forward to any Jobs created from the Bid.
- Project Name - The Project Name is the friendly name given to the project. The same name field value can be used for multiple Bids and for multiple customers.
- Note - The Job Name field is used in other parts of the system for lookups and also appears along with the Job Number in Invoicing.
- Job Location - The Job Location is the actual address of the other location reference of the Job. If the location of the Job already exists in the system, you can choose it from the drop down. If the location is new, you may add it to the Locations File by clicking the pencil box next to the Location Field. The location window will pop up and the location can be added without leaving the Bid screen.
- Comments - Free form comment that are specific to this Bid and can be used for any purpose. The comments will appear on the printed Bid.
- Note - Standard Bid Comments that should appear on all Bids can be added in Company Setup > Custom Texts Tab.
- Bid Date - The Bid Date is used to calculate the expiration date of the Bid.
- Status - The Bid Status is used for sorting on the Bid Start Screen.
- Wage Type - There are three system wage types: Private, Prevailing Wage State, and Prevailing Wage Federal.
- Start, Due and Submitted On Dates = These dates are used for managing your outstanding Bids.
Add Bid Lines - Select the Add Bid Lines button at the lower left to open the Bid Lines Window.
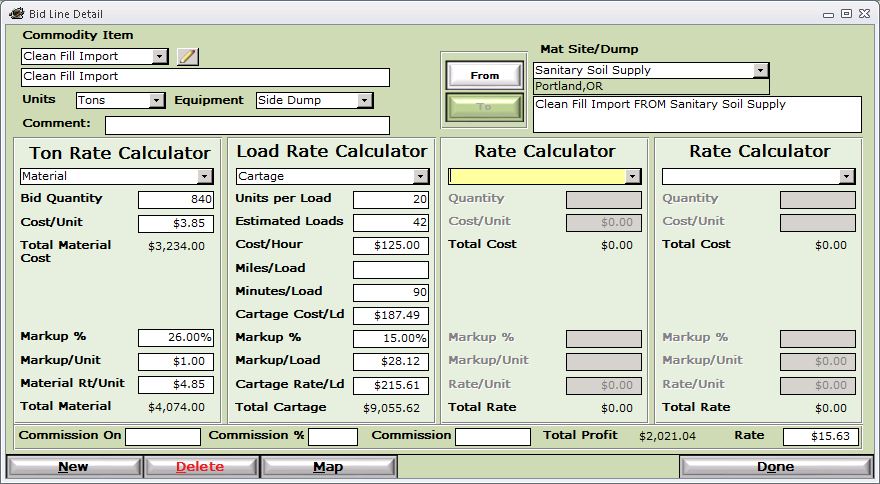
- Description - This is the description of the Commodity Item or Charge. Choose an existing item by selecting from the drop down or use the auto fill by typing in the first few characters.
- Note - To add a new commodity item choose <Add New Item> from the drop down. This will open the Commodity Item file window without leaving the Bid Line Detail screen.
- Units and Equipment - Select the unit of measure and equipment type. These will display on your Bid and calculate your rate either by ton or load.
- From or To - Select whether this commodity item will be coming From a material site or going To a dump site.
- Material or Dump Site - Select an existing location form the drop down or select <Add New Material Site> to open the location file.
- Note - The existing locations that supply the selected commodity will appear first on the drop down.
- Material Rate Calculator - is used to figure rates per ton.
- Cartage Rate Calculator - is used to figure rates per load.
- Other Rate Calculators - are used to calculate other charge type into the rate.
- Note - Add items to this drop down in Setup > Company Setup > Files tab.
- Commission - Commissions charged to subcontractors can be entered here to show total expected profit.
Other Options - Right Click on the Bid Line to open the Other Options menu.
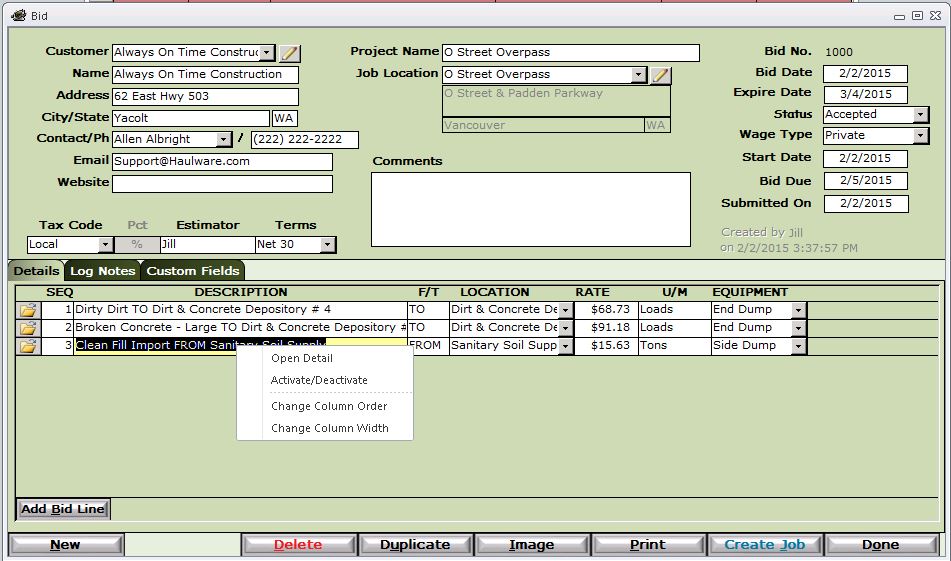
- Open Detail - Select Open Detail to open the Bid Line Detail window. You can click the Open Folder icon to open the Detail window.
- Activate/Deactivate - Selecting this option will activate or deactivate your bid line. Deactivating the line will cause it to not appear on the printed Bid or be transferred to the Job.
- Change Column Order/Width - Select Change Column Order/Width to arrange and size the columns you wish to display.
Buttons
- New - Create a new Bid.
- Delete - Delete this Bid. Note - Bids that have been used to create Job files cannot be deleted.
- Duplicate - Duplicate this Bid to use for another customer or Job.
- Image - Attach images to the Bid file.
- Print - Print, Fax, PDF, or email your Bid.
- Create Job - Create a Job File for this Bid.
- Done - Exit the Bid Window.