Driver Dispatch
How do I Dispatch Drivers?
The HaulWare dispatch system allows you to keep track of your current and past dispatches with easy color coded status visuals, driver notifications by text, email or good old print reports. Lets you know when you have your orders covered or how many more and of what type you need. Dispatch also assists in ticket entry by recalling what job/order the driver was dispatched to on that day. Another valuable tool is the Missing Ticket report which compares your dispatches to the tickets received highlighting any drivers that were dispatched but have not turned in tickets
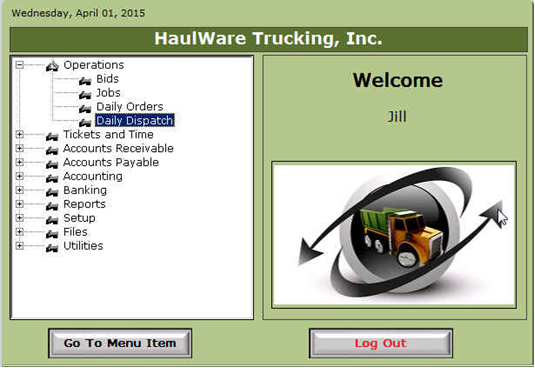
Screen Location - Main Menu > Operations > Daily Dispatch
· Open the Dispatch screen by double clicking on the Daily Dispatch menu item.
a. There are three tabs each displaying different views and information. Move between the tabs by selecting the tab.
Orders Tab
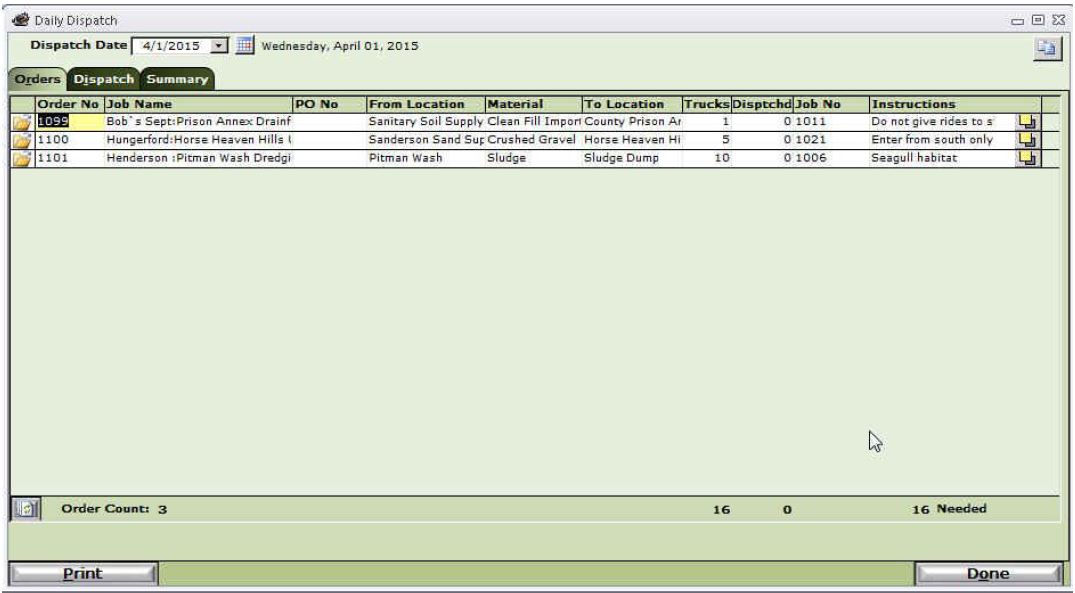
- Dispatch Date – The dispatch date will default to today’s date upon open. To change the date you want to work with use the calendar or the drop down menu.
- All the Orders for the selected date will be displayed showing
- Order Number
- Job Name
- PO Number
- From Location
- Commodity
- To Location
- Trucks Ordered
- Trucks Dispatched
- Job Number
- Order Instructions
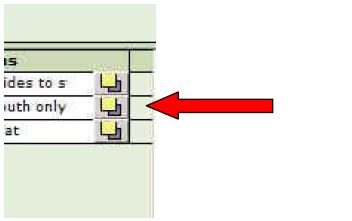
- Additional Order instructions can be viewed or added by opening the sticky note icon at the right of the order line.
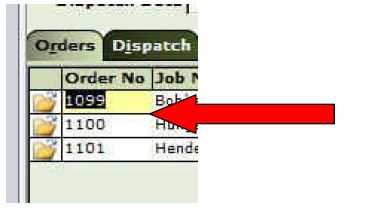
- The Order that has focus is highlighted in yellow. This is the first order that will be displayed on the next tab. Click on the order number to change which Order has focus or click the file folder to open the order.
Dispatch Tab
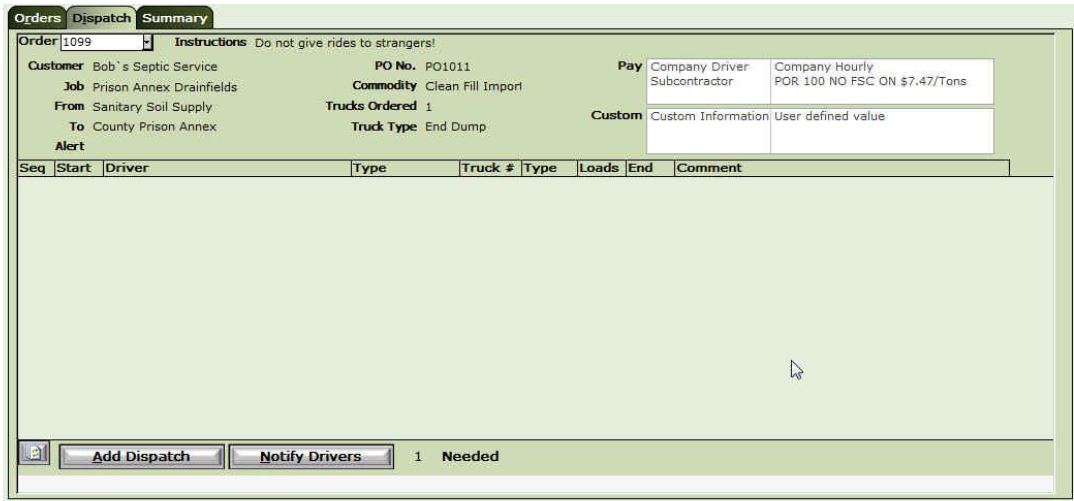
- The Order that had focus on the Orders tab will be displayed by default. To change the Order you want to work with select it from the Order drop down in the upper left.
- Pay - The Driver Types and Pay types/rates that were selected and setup in the Job file or on the order are displayed for reference.
- Custom - User defined custom fields of information are also displayed. These can be added to the Orders on the Custom Fields Tab.
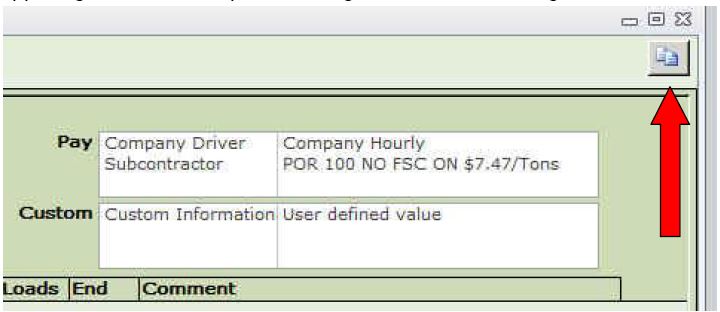
- To work with two orders at once, you can split the screen with the button at the upper right. Select the split button again to return to a single Order view.
- Add Dispatch
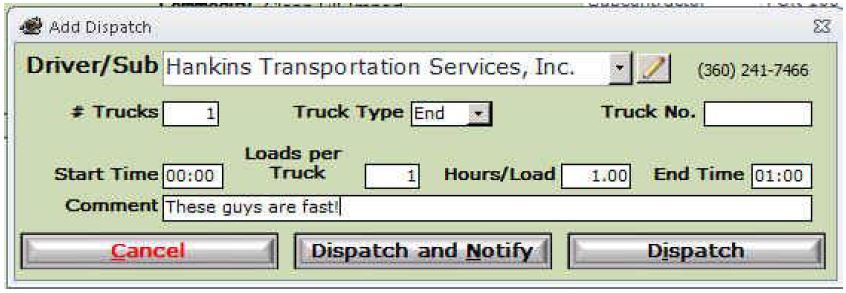
- Select the Add Dispatch button to select a Driver to dispatch on the Order.
- Use the Driver/Sub drop down to select the driver or select the Pencil icon to adda new driver record on the fly.
- Enter the number of trucks
- The Truck type is defaulted from the Order but can be overridden if needed.
- The Truck number will be defaulted from the Driver file if the selected driver is associated with a piece of equipment in the driver file. (Company Drivers Only).Subcontractor truck numbers are entered on the next tab – Summary
- Start time is also defaulted from the Order if populated and can also be overridden.
- Number of loads expected per truck and Hours per load are entered to calculate the End time.
- Dispatch and Notify
- This button will record the dispatch to the selected Driver and also send out a notification to the Driver. The Drivers method of notification can be by Text, Email or None. The settings for Driver Dispatch Notification are completed in the Driver file.
- Dispatch
- This button will record the dispatch only. The notification can be sent later or not at all.
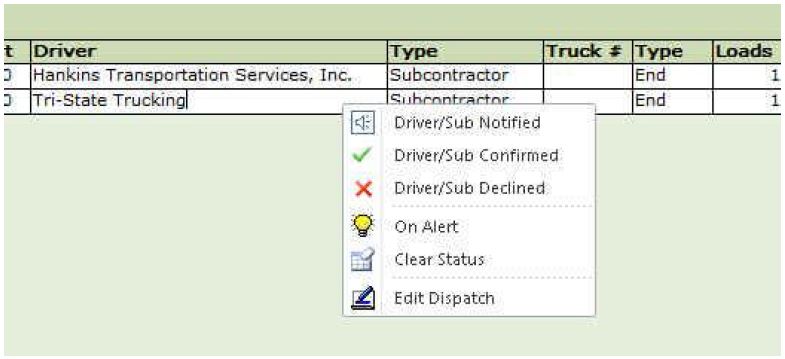
- Place your cursor over any dispatch and Right click with the mouse to manually advance the status or edit the dispatch
Summary Tab
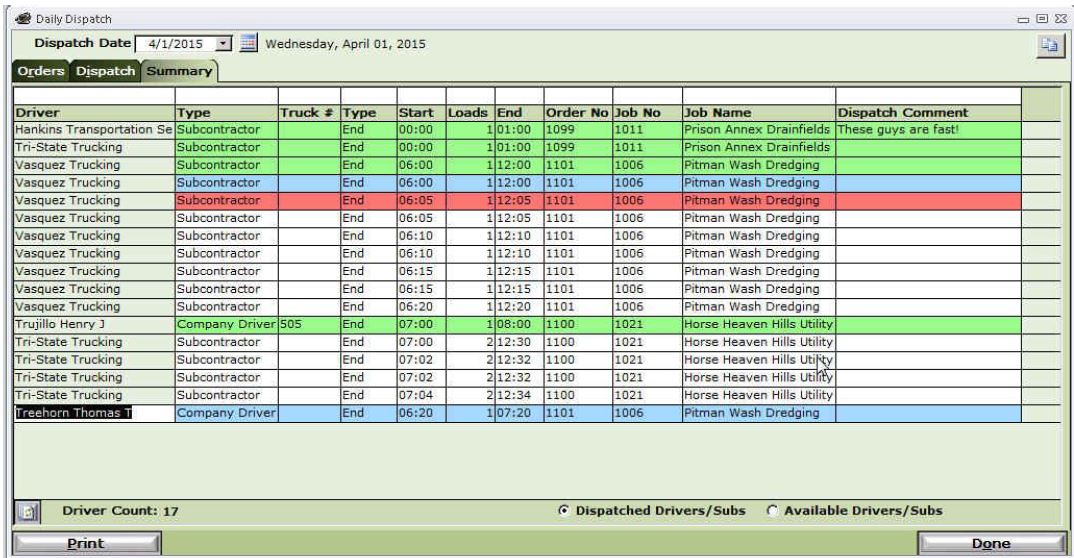
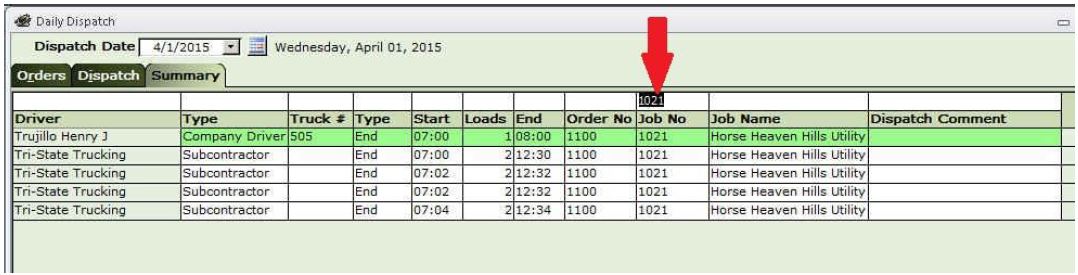
- The Summary tab is the overview of all the dispatches for the day. The color coding shows the current status of the dispatch. Status can be advanced manually with the right-click function or will be advanced by the system when using Notifications.
- Blue - Driver Notified
- Green - Driver has confirmed
- Red - Driver has declined
- Column filters can be used to change the view