Installing HaulWare on Mac OS
In order to access HaulWare Online from a Mac OS device you will need to have a valid Apple ID to access the Apple App Store and download a free app.
Also, depending on your version of MacOS and Microsoft Remote Desktop some of the labels in this guide may be different than what you see on screen.
Example: "Add PC" button is labelled instead "+" button.
1) Go to the App Store and download "Microsoft Remote Desktop" or "Windows App" depending on the version of MacOS you are running. There are many other apps that can also access HaulWare, but we cannot guarantee their success. The rest of this guide will assume you are using Microsoft Remote Desktop
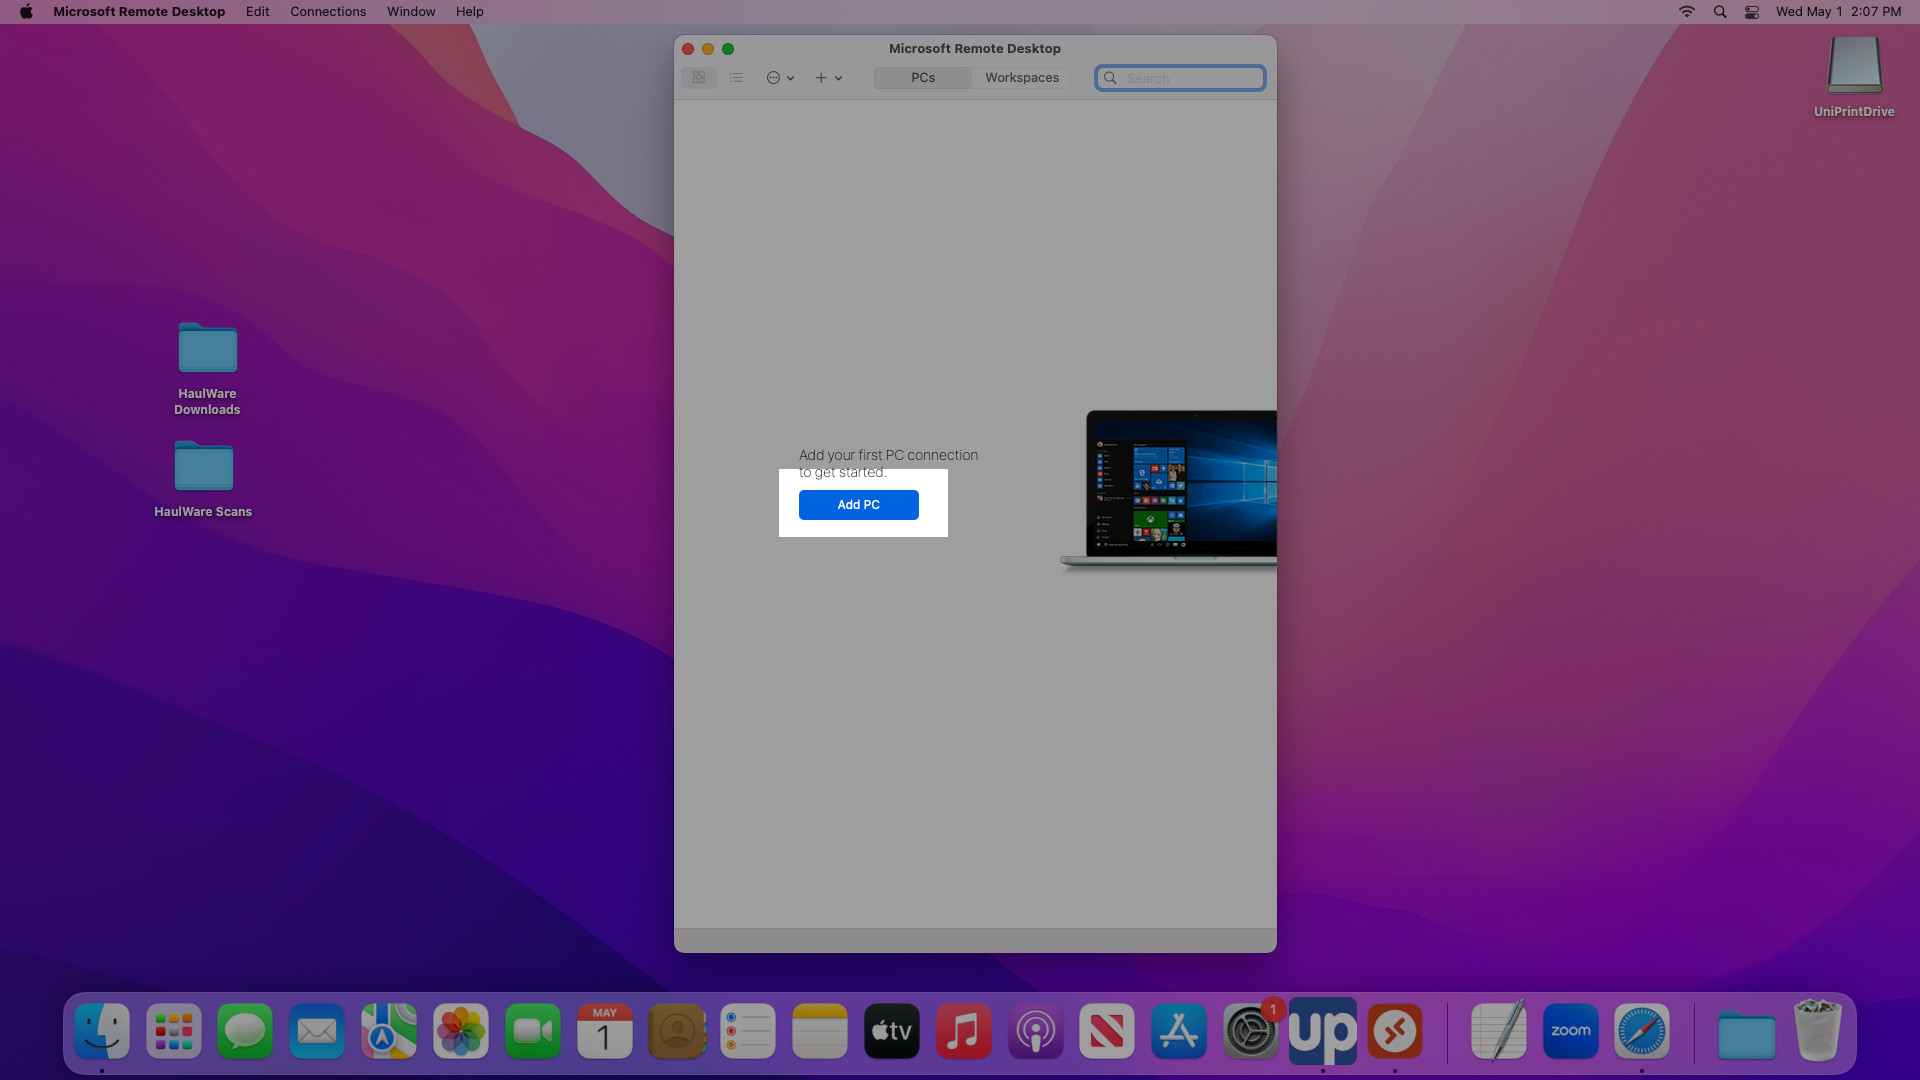
2) Once the app has been installed, and opened. Hit the "Add PC" button.
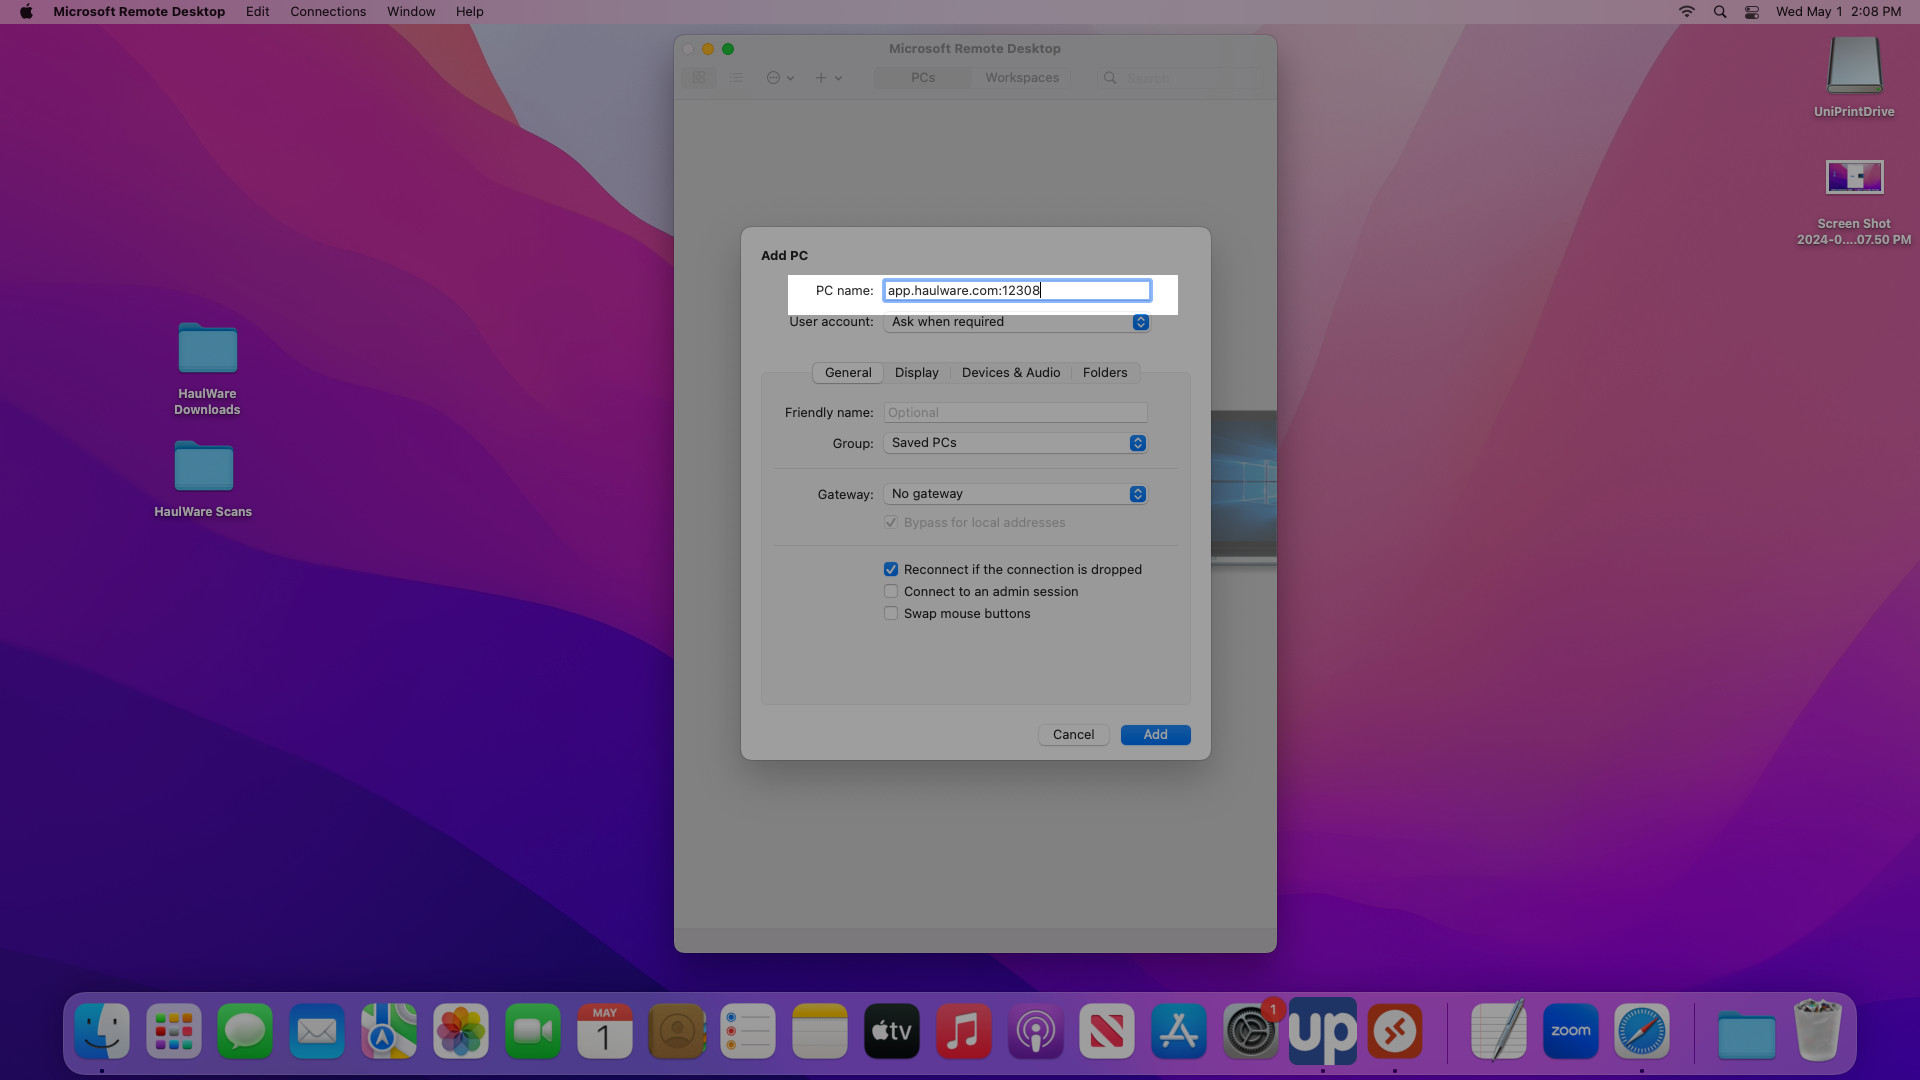
3) "PC name" is where you enter app.haulware.com:12308. If you were assigned a different server address you will enter that instead.
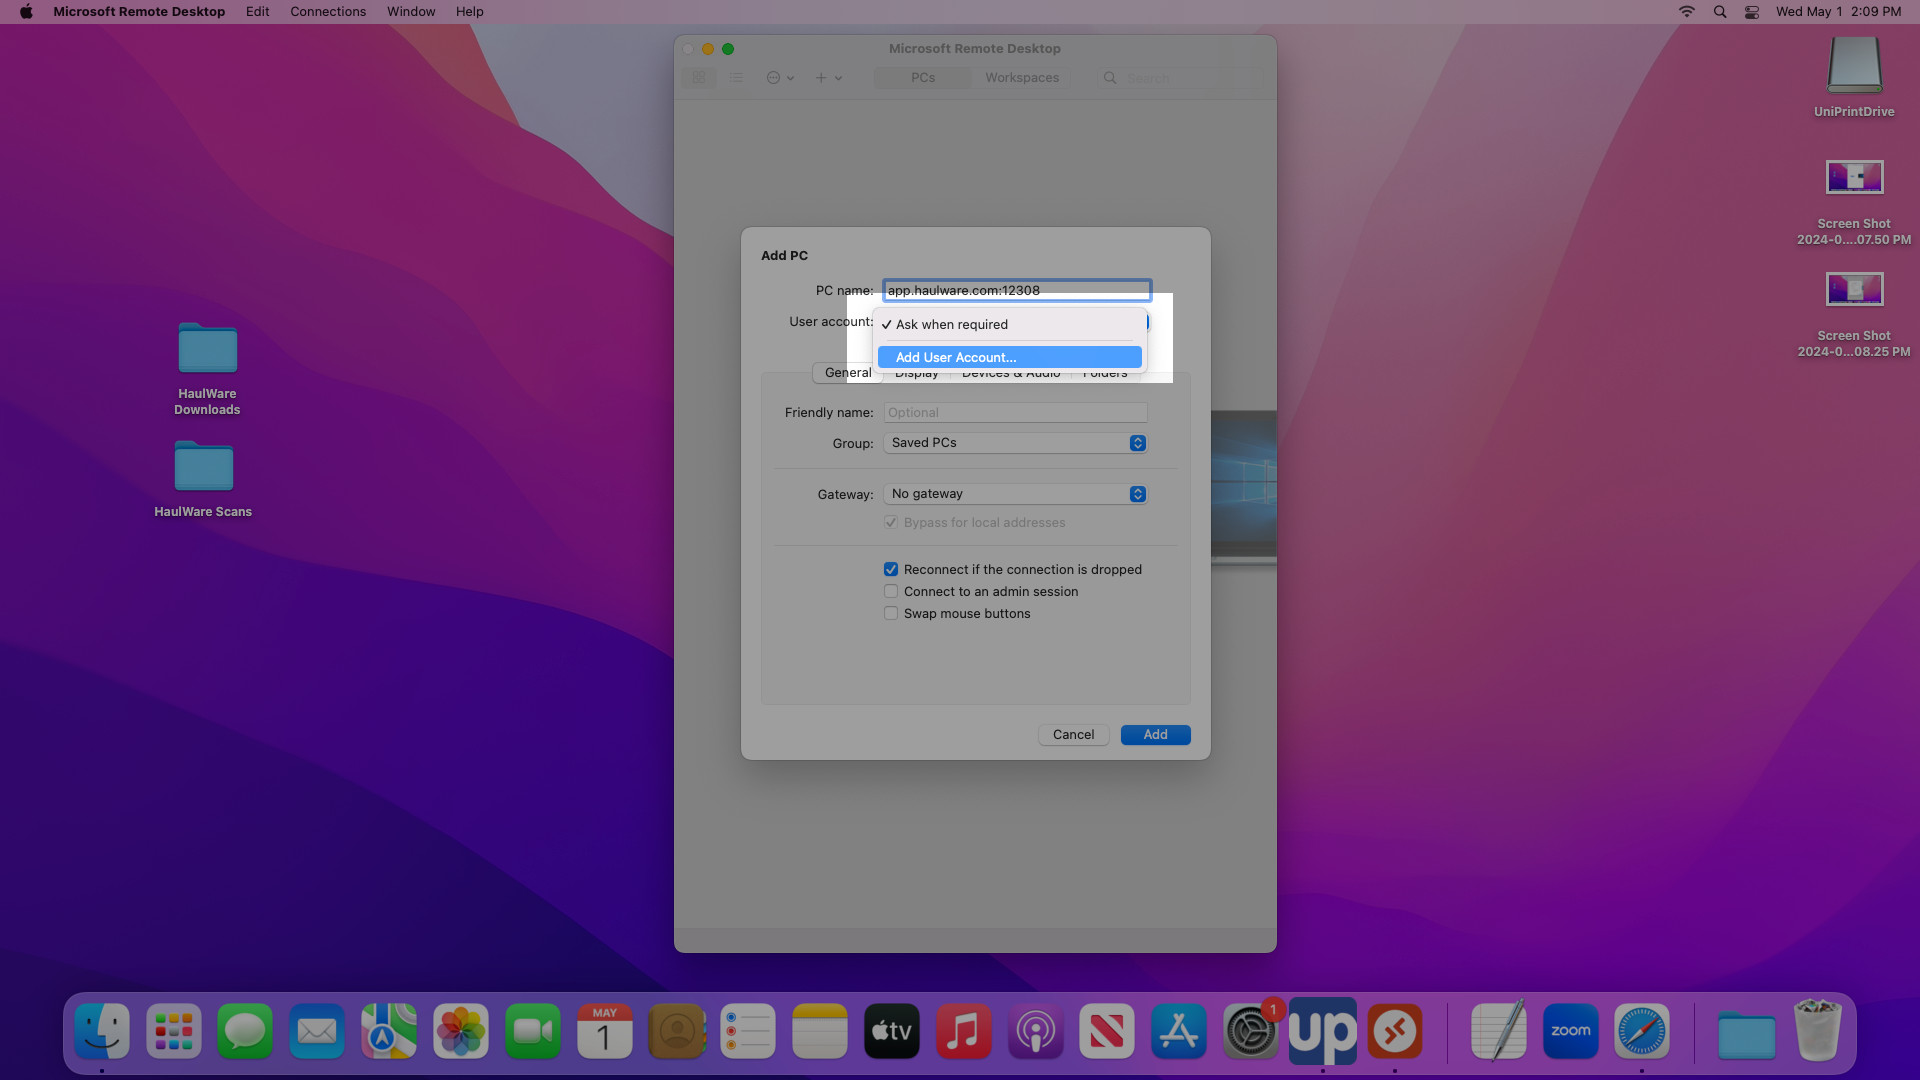
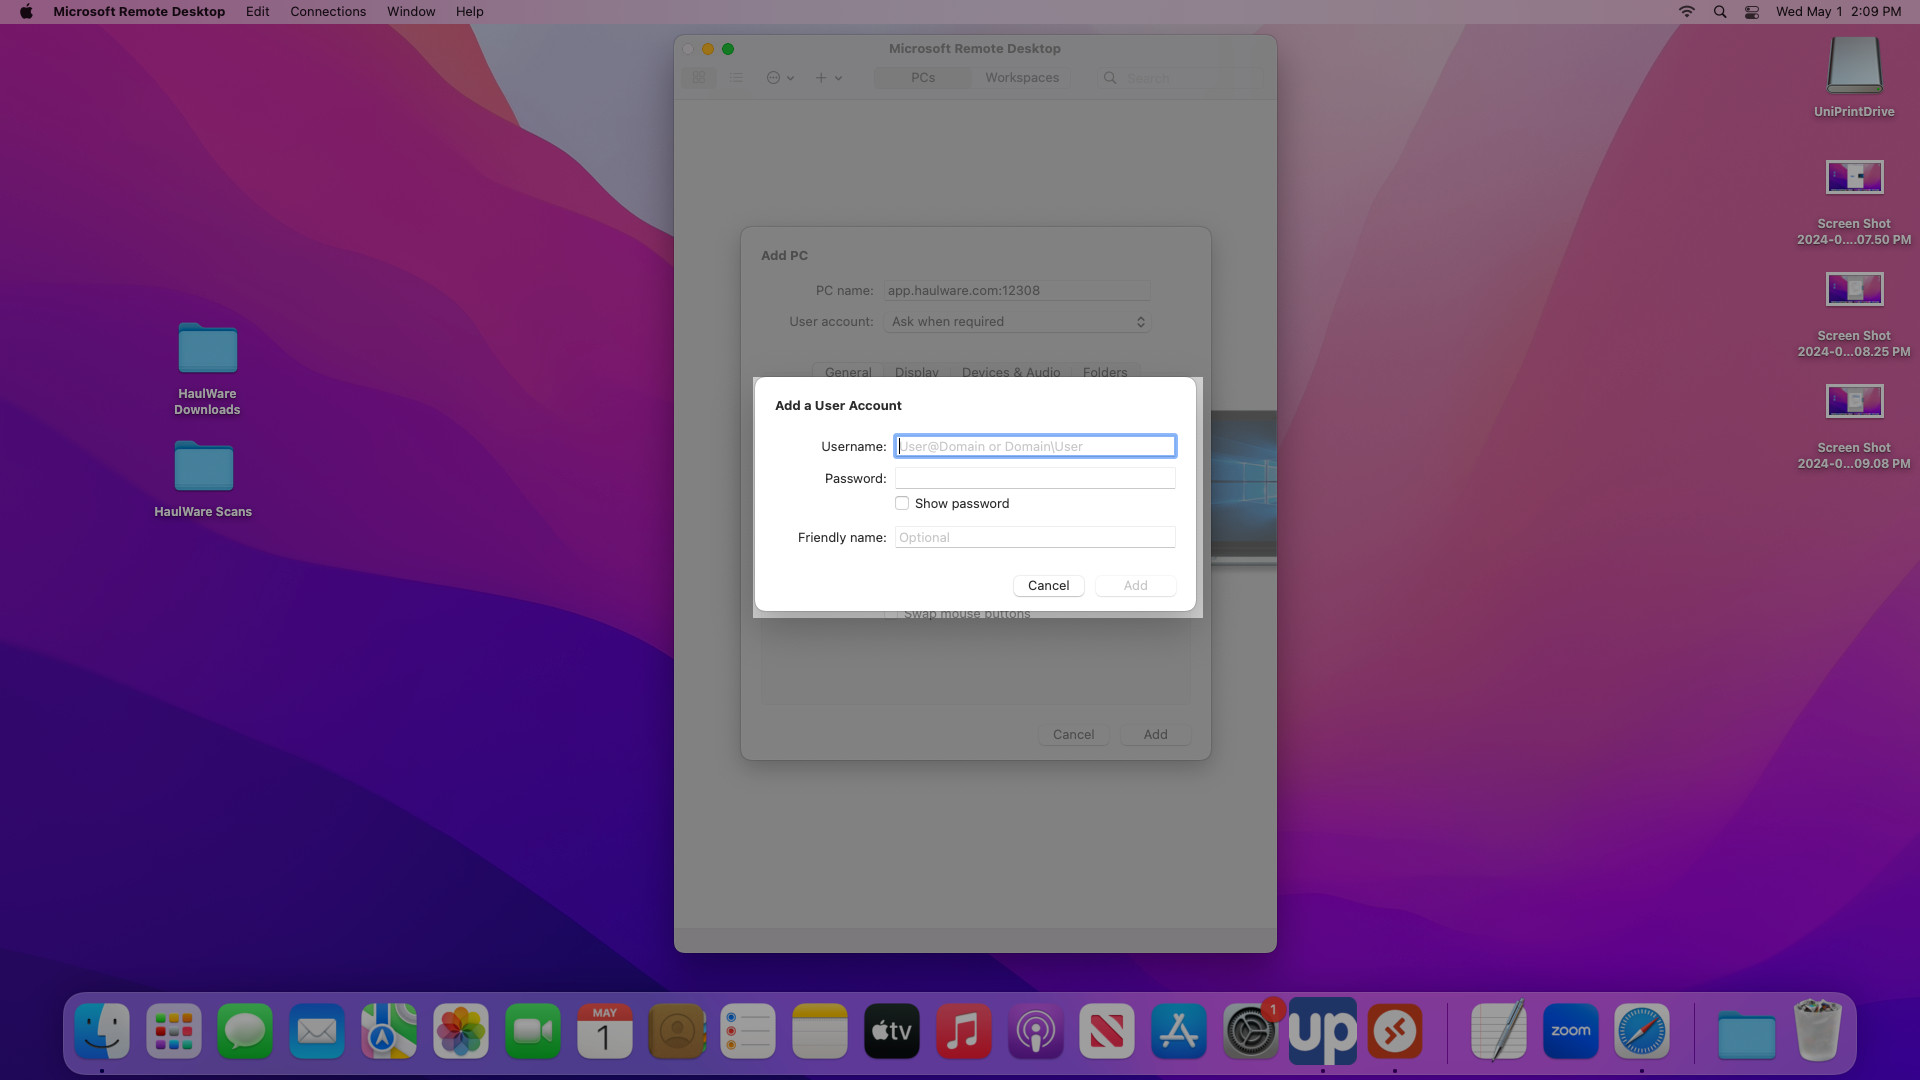
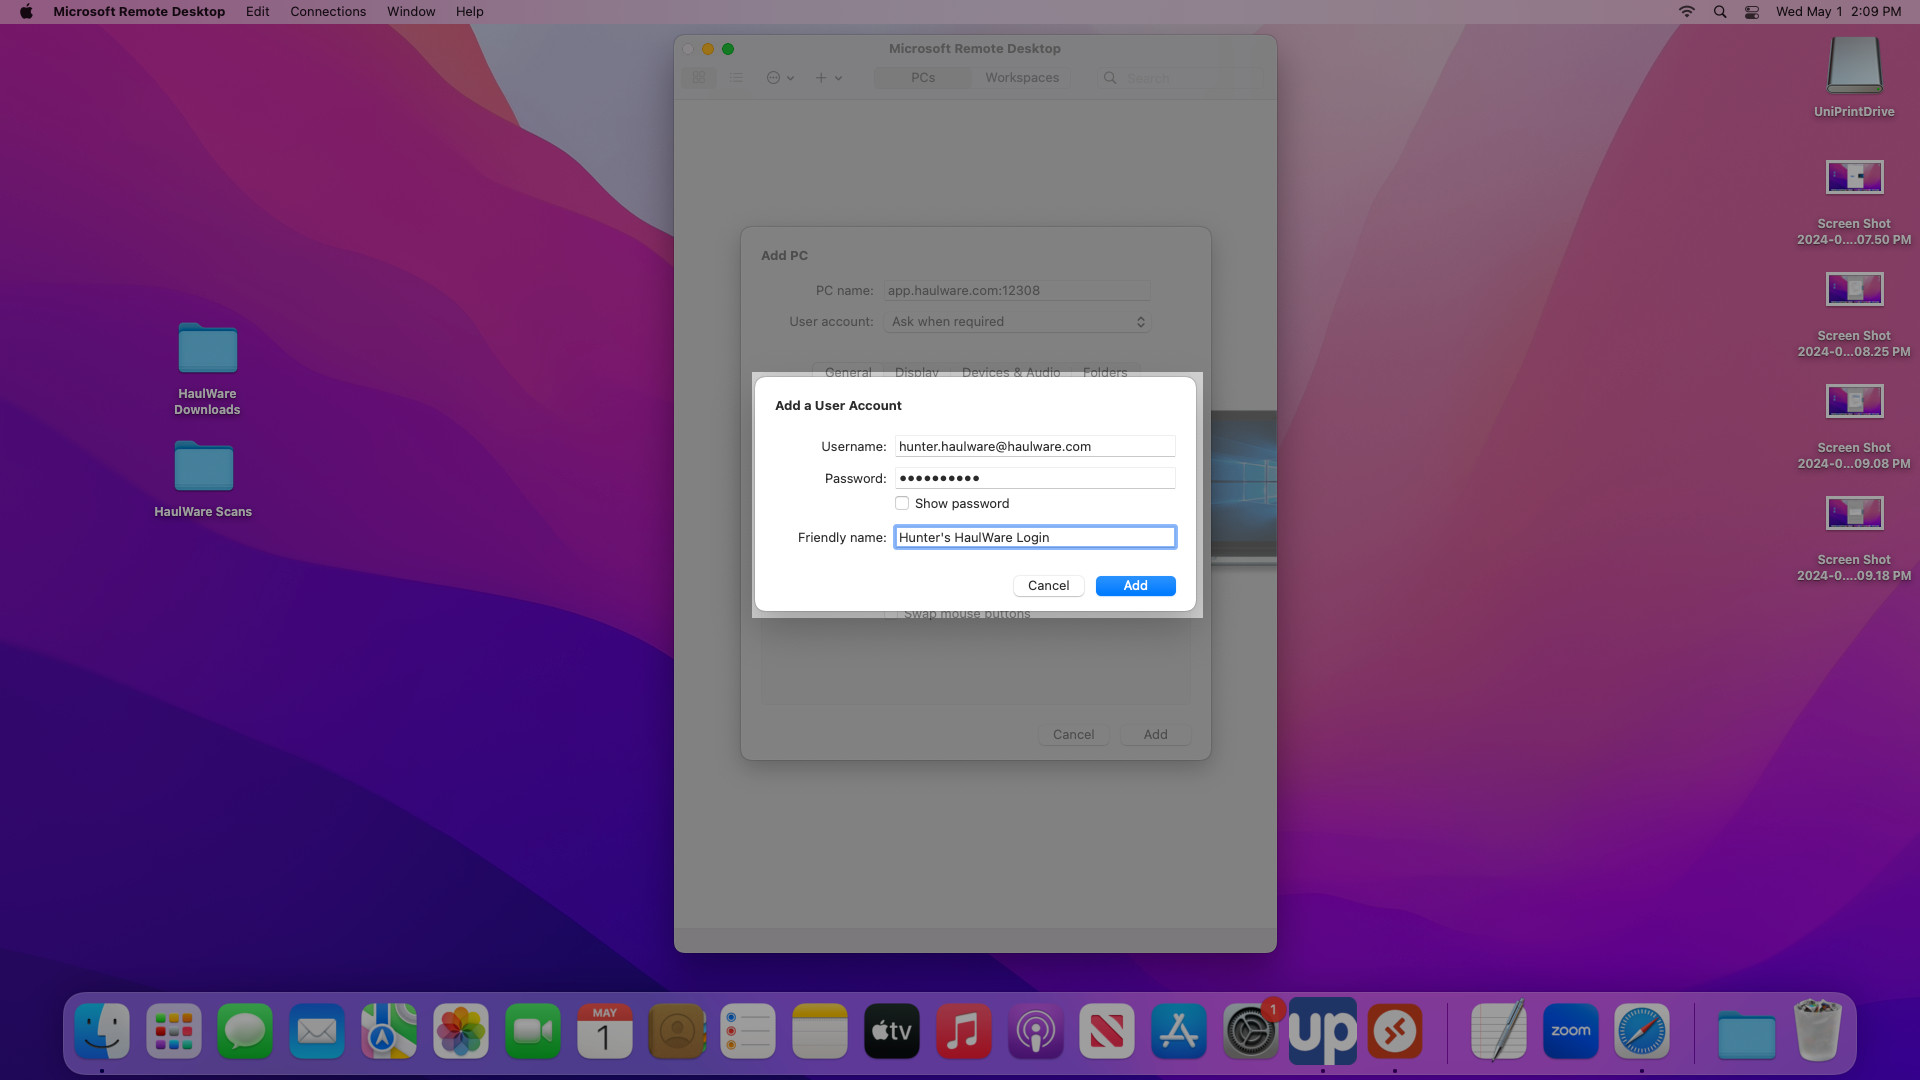
4) Use the "User Account" drop down and select "Add User Account..." and enter your assigned HaulWare username and password. If you are logging in for the first time you will be changing your password later.
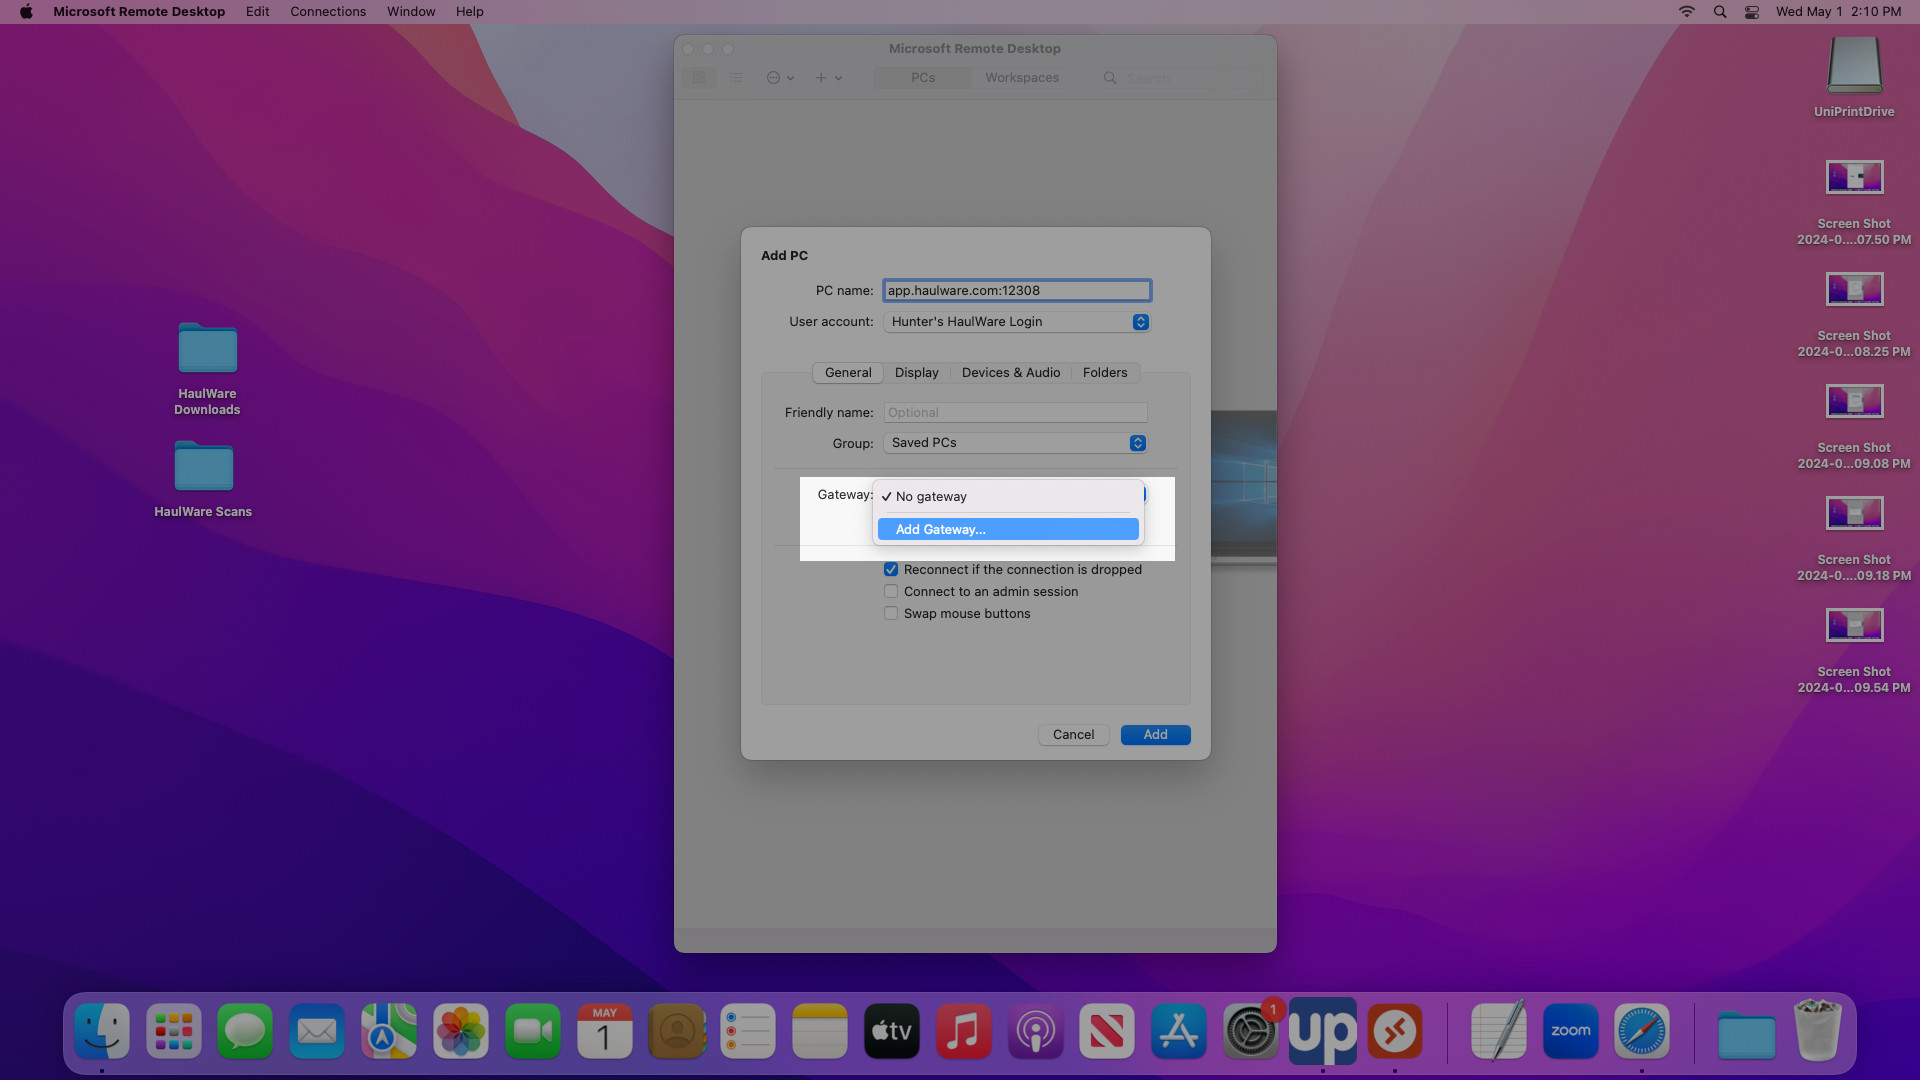
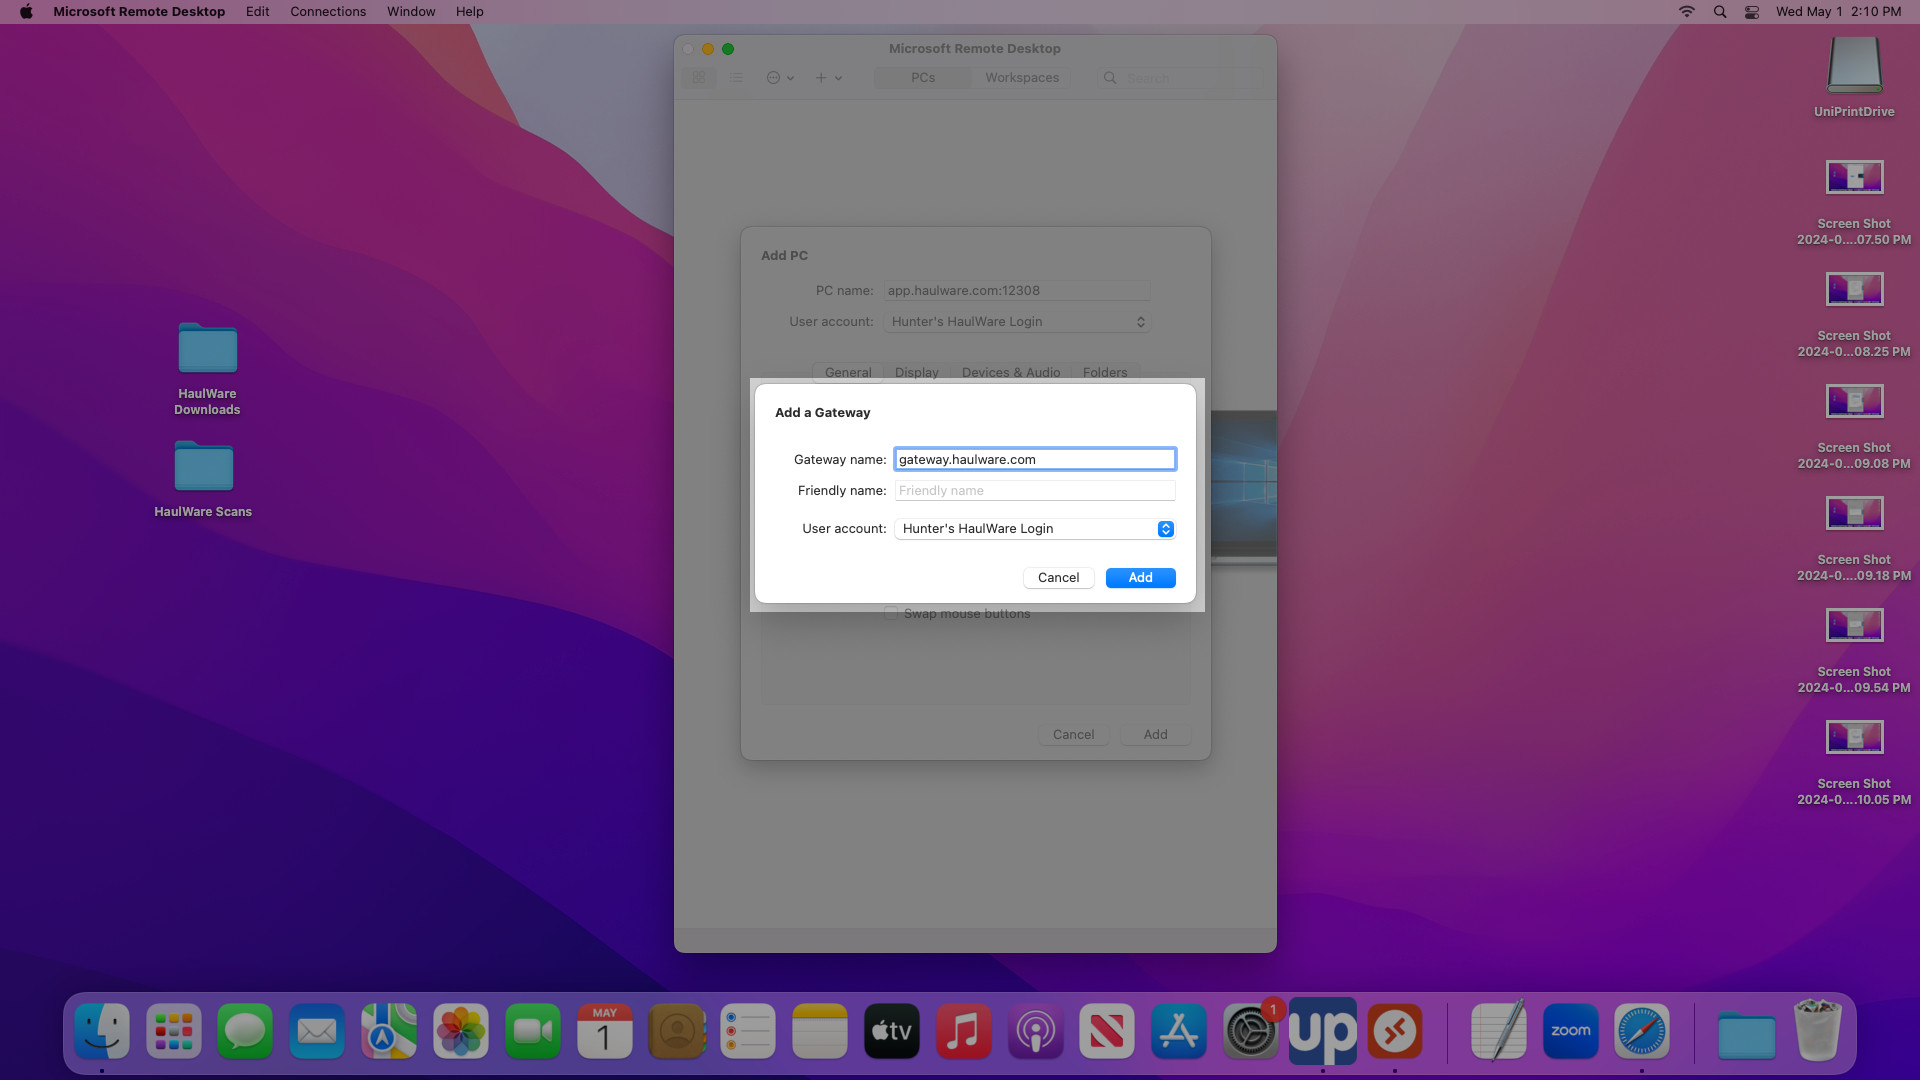
5) Under the "General" tab find "Gateway" and enter gateway.haulware.com as Gateway Name. Be sure to use your HaulWare login as the credentials for the gateway.
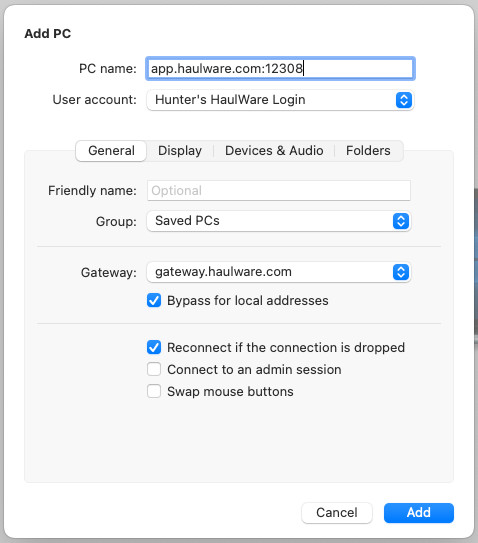
Once you've completed these steps your RDP connection window should look similar to this. Once you have confirmed that your credentials are correct hit the "Add" button near the bottom.
In order to print from HaulWare you will need to follow the instructions on this page here. Please follow those instructions for Mac OS and then continue the steps from this point forward.
6) In order to download images from HaulWare, and upload images to HaulWare we will need to set up two folders on your Mac. In this guide I will be using two folder on the Desktop named "HaulWare Downloads" and "HaulWare Scans". Either of these folders can be from a Dropbox or another cloud storage service as long as it is a folder you can access in Finder.
7) Edit your RDP connection by hovering your mouse over the connection block and hitting the "edit" button. The button may have no text and is simply a pencil icon.

8) Navigate to the "Folders" tab, and hit the "Redirect folders" checkbox so that it is checked.
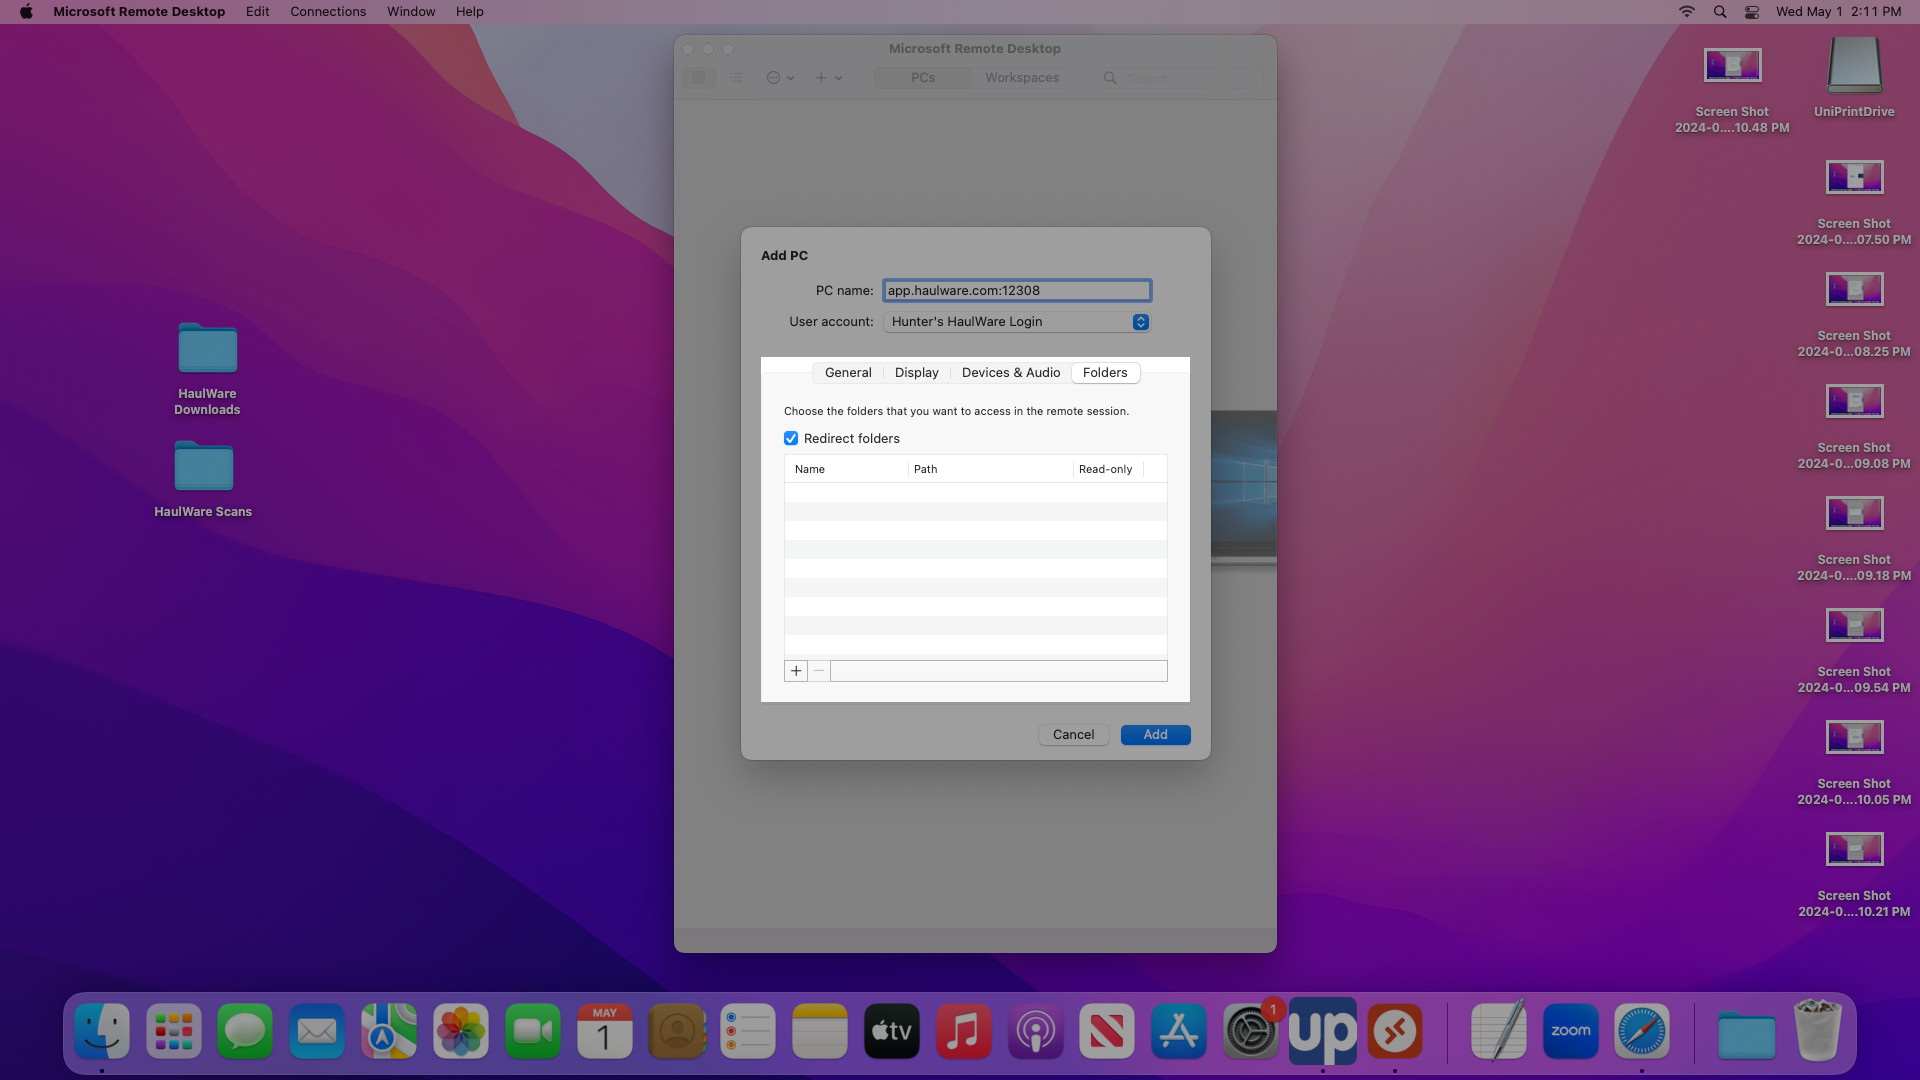
9) Now, hit the "+" button at the bottom left hand side of this window. Then, find the Download folder you have set up previously, select it, and then hit "Open" in the bottom right hand side of this window.
10) Repeat the last step, but instead select your "Scans" folder we set up previously.
If you have done everything correctly your screen should look similar to this. A Download folder, a Scans folder, and the UniPrint Drive item as set up here.
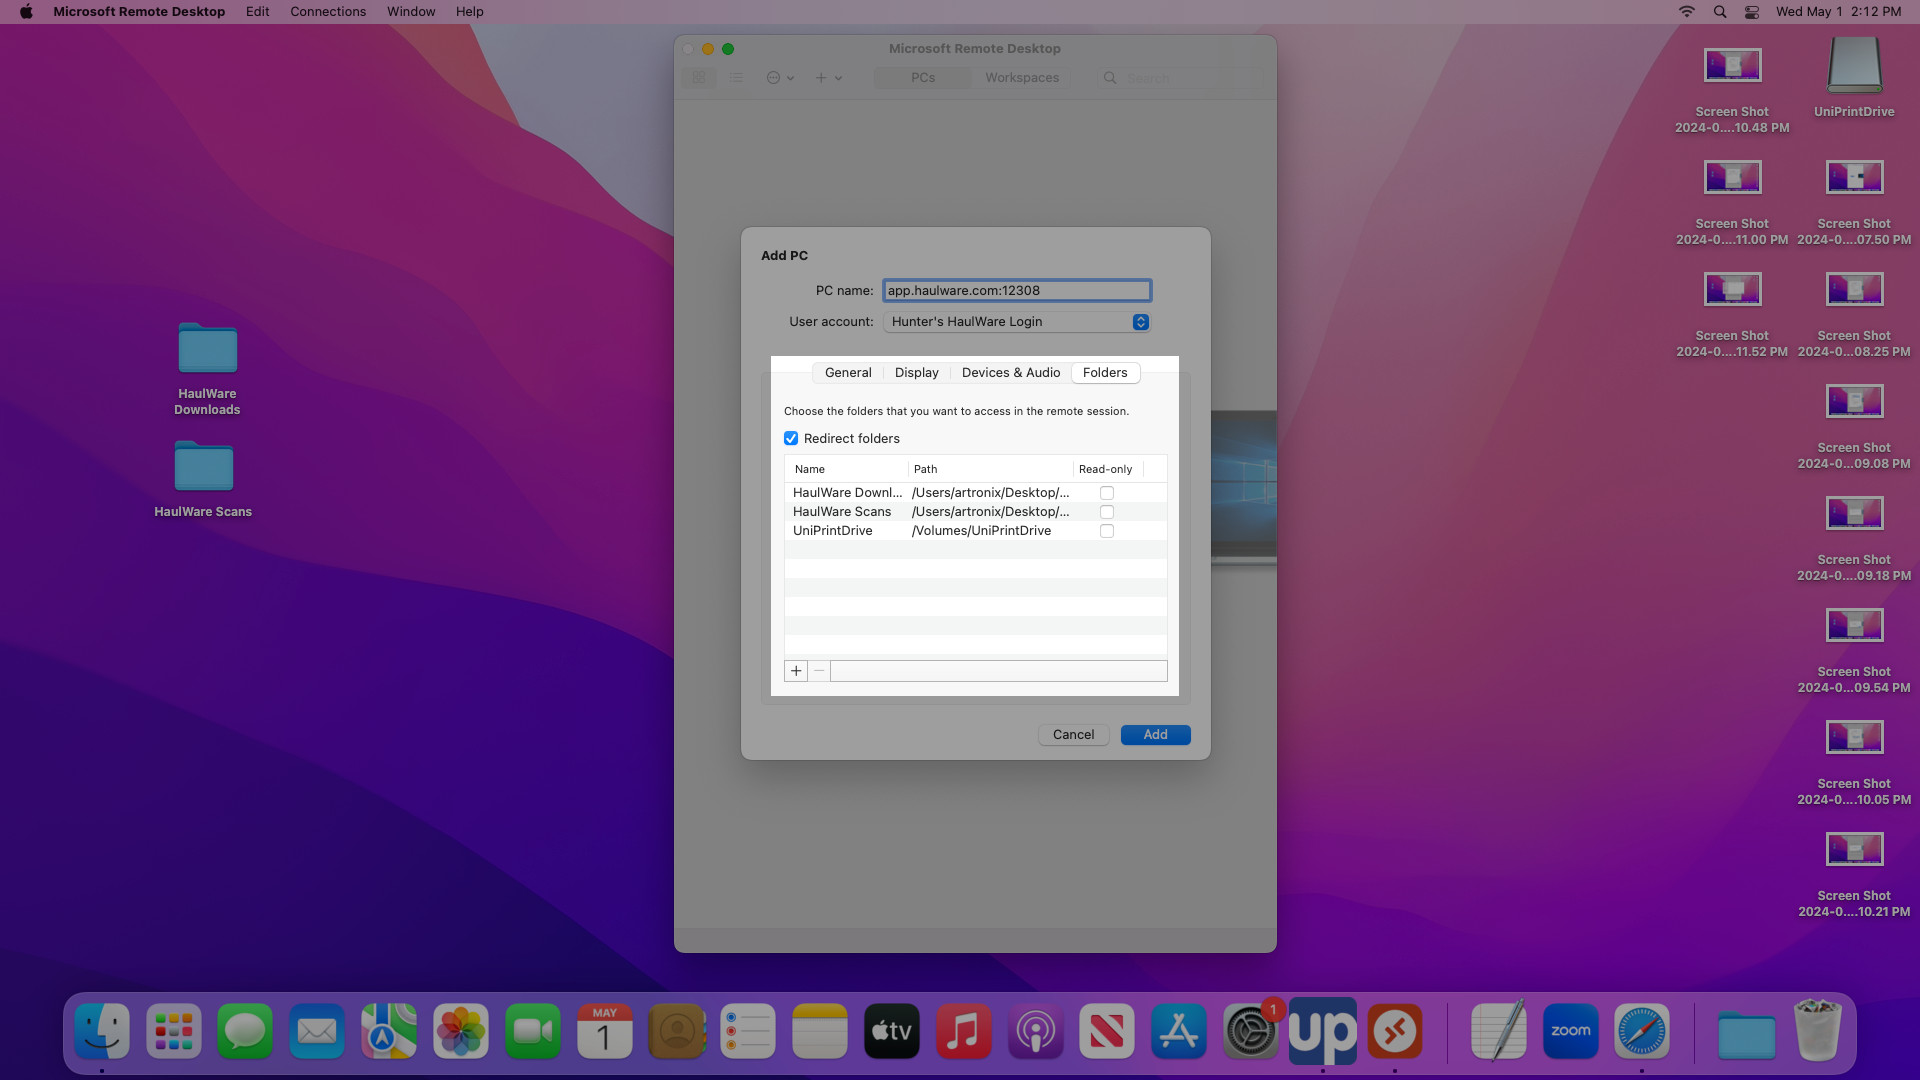
If you have confirmed that you set up the folders correctly you can now hit the "Save" button. If you are not editing the connection item the button will be labelled "Add".
11) Now, we are going to log into HaulWare and do the final steps to Mac setup. Double click on your HaulWare connection to log in.
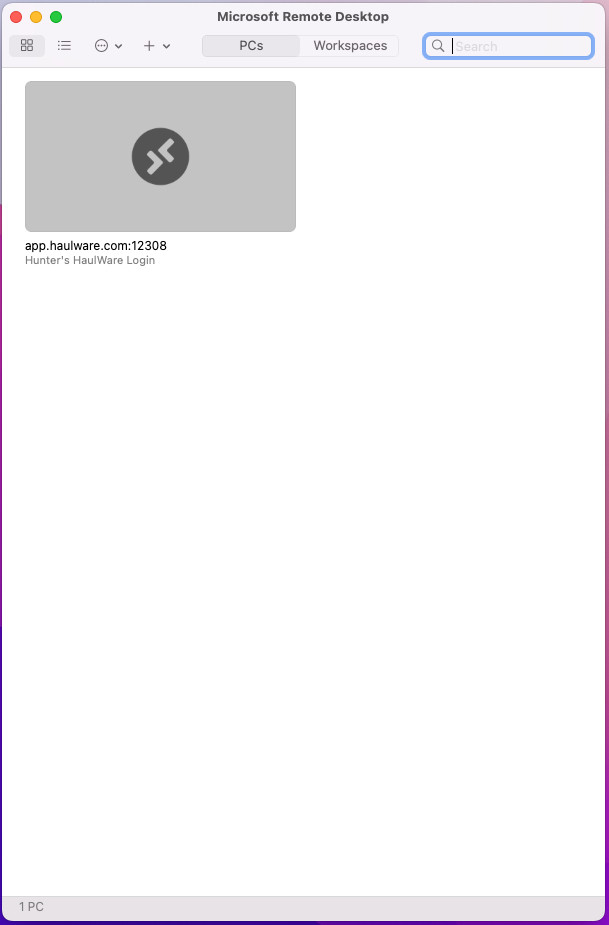
If this is your first time logging in you will be asked to enter a Authorization Code that is sent to your primary email address, and you will also be prompted to change your HaulWare password.
12) Once you have successfully logged in the first thing you will need to do to finish your Mac setup is navigate to your User Profile. Toolbar > User Profile
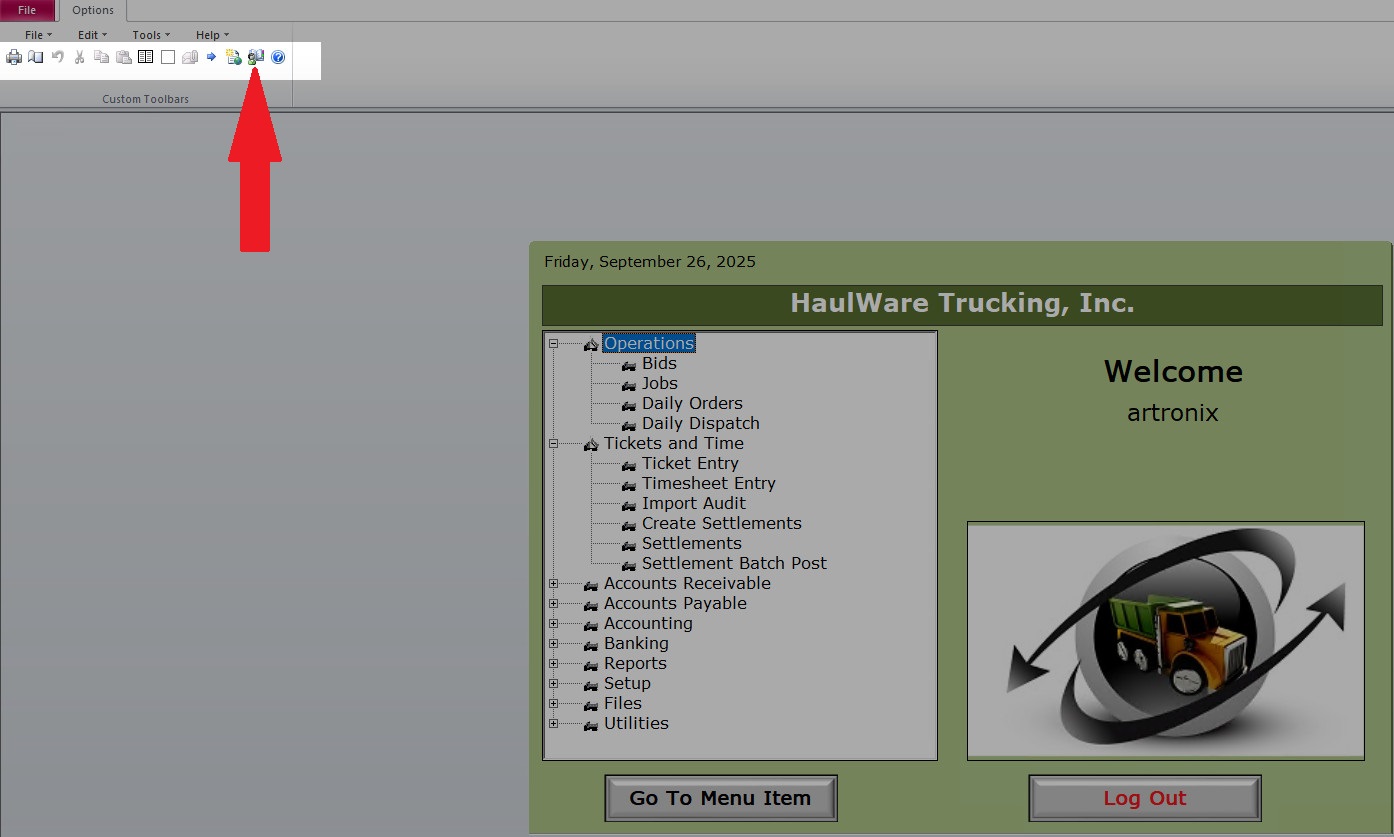
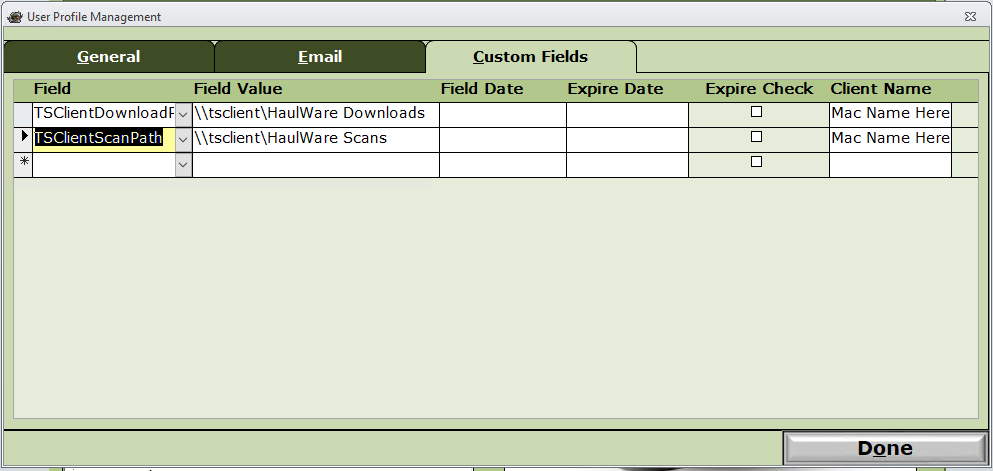
13) Select the Custom Fields tab and add three lines using the drop down selection. TSClientDownload, and TSClientScanPath.
Field Value needs to be set as "\\tsclient\ *insert folder name here* " Where the folder name matches what was established on Step 10.
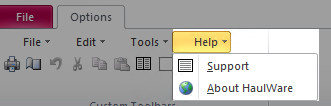
14) Now, using the top menu bar open the About page under Options > Help > About HaulWare
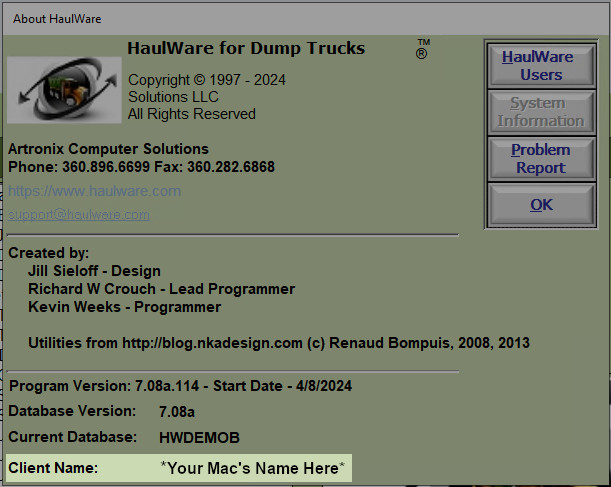
15) The About page will show you the name of your Mac that needs to be put into the Client Name box on Step 13. HaulWare may read your Mac's name differently than how you have typed it when first setting up your Mac, so please use the About page to make sure it is accurate.
16) Once you have put your Client Name in place, you will need to close the screen using the Done button, and Log Out of HaulWare using the Log Out button on the Main Menu.
17) Since you have changed your password you will need to also change the password on your local end. First select Microsoft Remote Desktop so that the App name is used in the upper left hand corner of your desktop.
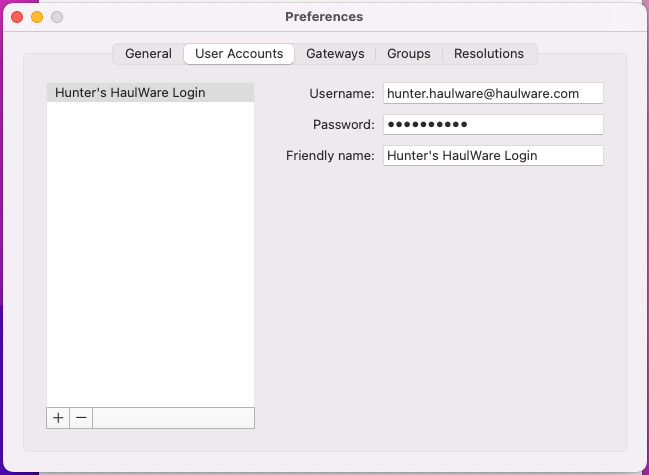
18) Click on "Microsoft Remote Desktop" in the upper left hand corner, and select "Settings". Sometimes this is labelled as "Preferences..."
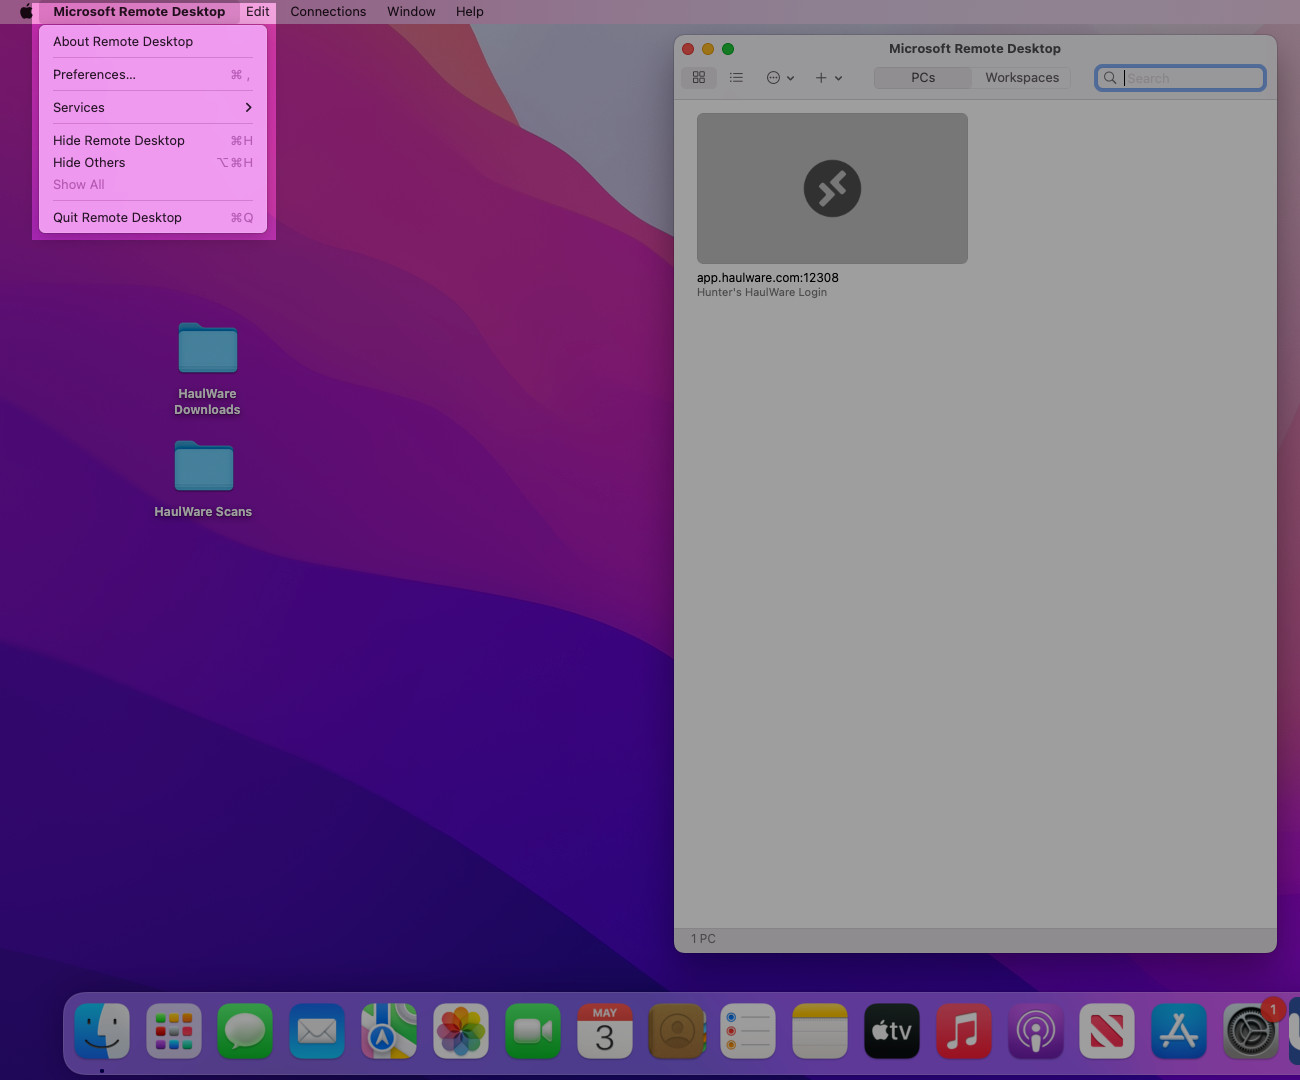
19) On the following window select "User Accounts" and select the login you created earlier. Then, input the password you created for HaulWare on first log in in the Password box, and close the screen.
You are done!
You should now be able to double click on your connection item in Microsoft Remote Desktop and it will automatically log you into HaulWare.
Please call or email support if you have any troubles getting through the setup and we will assist as soon as possible.