Security Profiles
General Settings
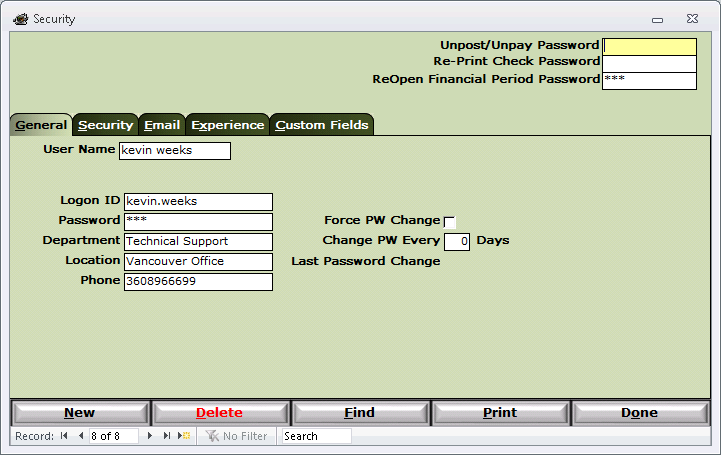
- User Name - Enter the user name as it will be displayed on the Main Menu
- Logon ID - This is their login ID. It normally will be the user First Name Dot(.) Last Name
- Password - This is their HaulWare password.
- Note: This password is only used when the Window's Logon ID is different from the HaulWare Logon ID.
- Note: Not to be confused with their Windows Server Password that is used when logging on to the server.
- Department, Location, Phone - All are reference fields only
- Force PW Change - This will force the user to change their HaulWare Password on next logon.
- Change PW Every # of Days - This will force the user to change their password every # of days.
- Last Password Change - Shows the last date the user successfully changed their password.
- Note: Items 3, 5, 6, and 7 are only used when the Window's Logon ID is different from the HaulWare Logon ID.
- UnPost / UnPay Password - This is the system password used when unposting / unpaying item.
- Reprint Check Password - This password will prompt the user when printing a check that has already been printed.
- ReOpen Financial Period Password - This will prompt the user when Opening a Closed Financial Period.
Security Settings
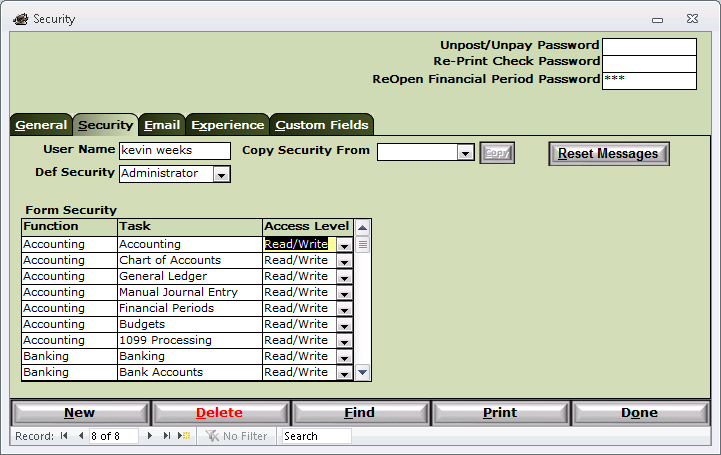
- User Name - Same as on the General Tab
- Def. Security - When adding a new user this will set their security setting to a predefined group. Changes can be made later.
- Copy Security From - Copy another users security settings to this user. Select the user and then click the Copy button.
- Reset Messages - Resets all the messages where the user has selected to Do not Show Again.
- Form Security - There are 3 levels of access to just about every form in the Program.
- Ready / Write = Can view, create new, edit, and delete records.
- Read Only = Can view the data but can not create new, edit or delete existing records.
- No Access = User can not even view the data. If this is done at the highest level the Menu option will not even appear.
Email Settings
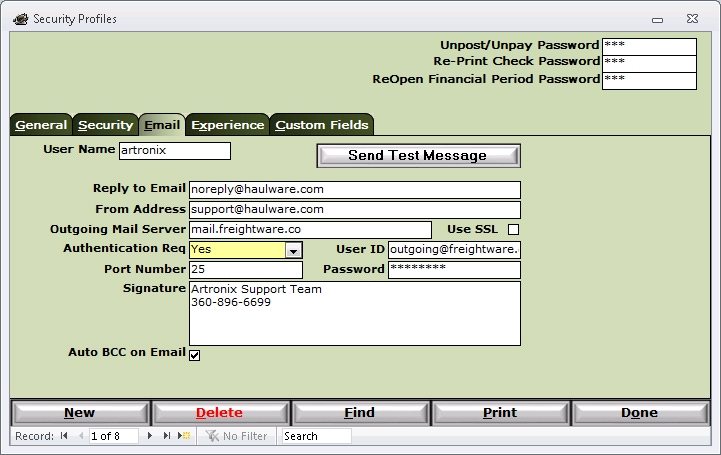
- User Name - Carried over from General Settings.
- Reply to Email - This is the email address you want to use when a recipient replies to your email.
- From Address - This is the email address that shows who sent the email to the recipient. Usually the same as the Reply to Email.
- Outgoing Mail Server - This is the name of your outgoing or SMTP mail server.
- Authentication Required - If your SMTP server required authentication or not.
- Use SSL - If your SMTP server requires SSL security, check this box.
- User ID and Password - If your SMTP server requires authentication the put in the user ID and Password to use.
- Port Number - The port number required by your SMTP server.
- Signature - Automatically add this signature to all emails.
- Auto BCC - Check this to always send yourself a copy of the email.
- Note: HaulWare is not an email client and does not keep copies of emails sent. Use this feature to send a copy to your personal email.
- Send Test Message - Click this button to send a test message to the address entered into the From Address Field. If all is configured correctly you will get a message in your inbox.
Note: These email settings can be obtained from your email provider. They are usually the same as used in your email client. Just request the SMTP Mail server settings for message relays.
Note: Most of the FREE email clients, i.e. Google Mail and Yahoo Mail, do not allow the SMTP relay request. You must purchase an upgraded account in order to use them. There are a number of "FREE" SMTP Relay service providers out there. You can use these to accept the HaulWare email message and relay it to your email addresses. Google "SMTP Relay Service". http://www.smtp2go.com/ is a good example.
Note: Once you successfully can click the Test Message button, you will be able to send email from HaulWare.
Experience Settings
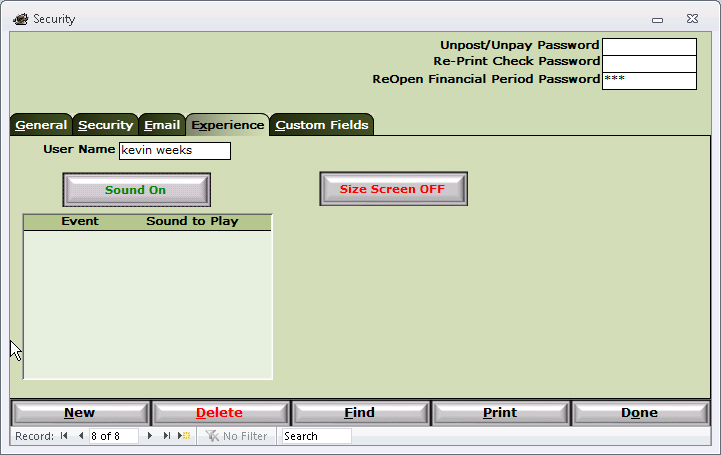
- User Name - Carried over from General Settings.
- Event Sounds - Coming Soon
- Size Screen On / Off - Toggles the Screen Size feature on and off.
- Note: When this is on the screen will try to fill in the entire window, increasing the screen, fields, and fonts.
Custom Fields
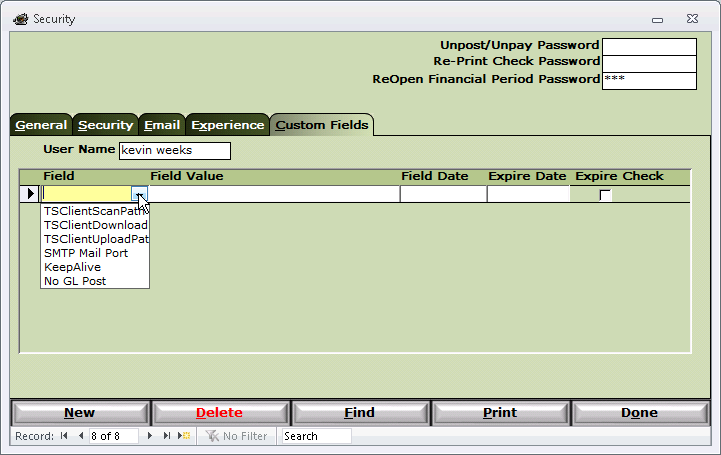
- Field - Enter the Field Name from the list or Right Click to add / remove items from the list.
- TSClientScanPath - The non standard folder location for images to be attached. The standard folder is: C:\Program Files\Artronix\Scans.
- TSClientDownloadPath - The non standard folder location for files to be downloaded to your computer. The standard is: C:\Program Files\Artronix\Downloads.
- TSClientUploadPath - The non standard folder location for files to be uploaded into HaulWare. The stand is: C:\Program Files\Artronix\Uploads.
Note: Please read this FAQ on how to map your local drives.
- Keep Alive - For Administrator Use ONLY
- No GL Post - Setting this for the user means they do not have the ability to Post / UnPost any items.
Buttons
- New - Create a New HaulWare User. Note: This is only half of the setup. You will need to send an email to mailto:support@haulware.com requesting a user to be setup to access HaulWare.
- Delete - Delete the currently selected user.
- Find - Using the find feature, locate a user account to modify.
- Print - Bring up the Security Print Dialog window to print reports.
- Done - Exit this screen.