Ticket Payables
How do I use the Ticket Payables?
Ticket Payables provides an audit of your material or dump fees, creates the AP bill and adds to your job costing report all in one motion. It is a powerful tool in insuring that the rates you negotiated with the vendor are what you actually are paying. That your job costing reports are capturing these costs and automatically creating the associated AP bill accurately. Here’s how it works –
Main Menu> Accounts payable>Ticket Payables
When tickets are entered against job lines that you have indicated by checking the PV (Pay Vendor) on the job line that there will be vendor billing the Ticket Payables function kicks in.
When you open the ticket payables you will see the start screen which allows views of payables still in the process of being created as well as those already finalized and sent to AP. The default view is unposted, meaning not yet posted to Accounts Payable.
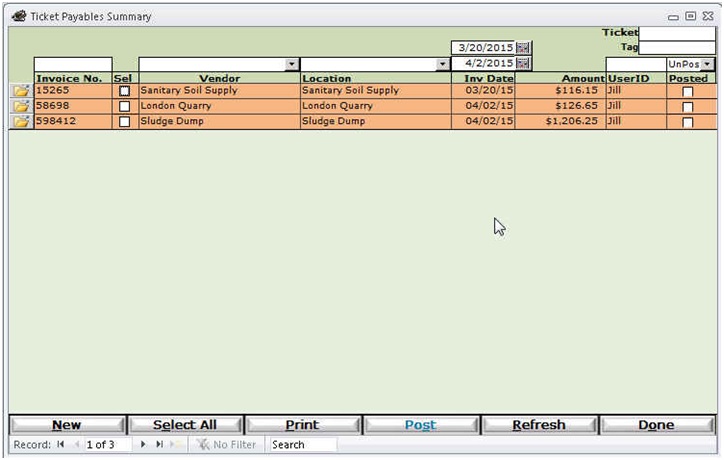
- Ticket Payables start screen
- Column filters and date range filters
- New button to begin a new invoice
- Select All for posting to AP
- Print opens to report print dialog to the AP category
- Post button posts the selected invoices
- Refresh
- Done exits the screen
Ticket payable Creation
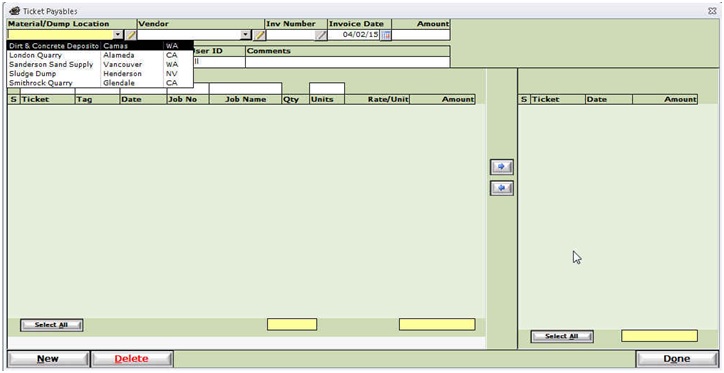
- Material/Dump Location - Begin by selecting the Material/Dump location. Only locations that have outstanding tickets will be displayed in the drop down.
- Vendor– The vendor associated with the location will auto populate. If the vendor file has not been associated with the location or has not been created you can create it on the fly by selecting the pencil box next to the Vendor field.
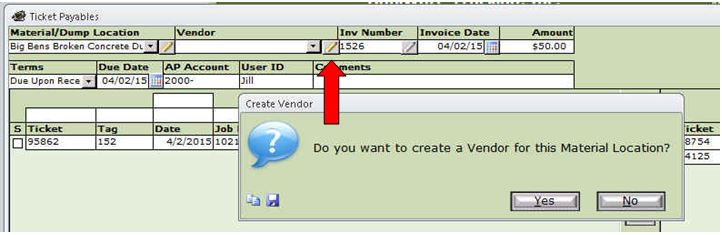
- Enter the invoice number, date, amount and terms as they appear on your vendors invoice.
- The AP Account and User ID will default from system settings
- Comments are free form and internal.
- Tab through to populate the screen with all the outstanding tickets in the system for that Material/Dump location.
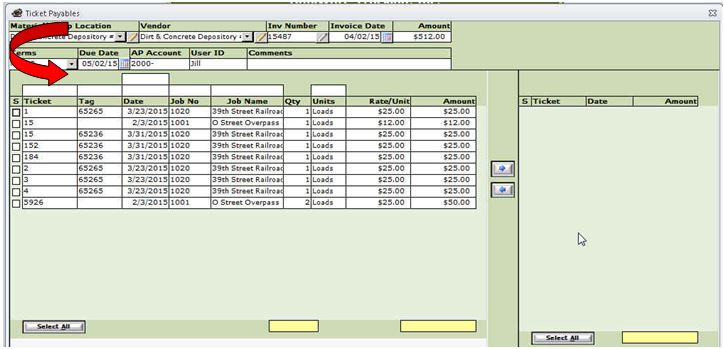
- Using the column filters, narrow your results to match those of your vendors invoice.For example the vendor has invoiced you for tickets between the 1st of the month and the 15th. You can also filter by ticket number, Tag number, Job number, job name or units of measure. If it doesn't match exactly,that’s alright, you are only narrowing the results for ease of working with it.
- Select the tickets that appear on the vendors invoice individually with the selection box at left or Select All with the button below.
- Verify the amounts and rates. If the amounts differ you can edit them by placing your cursor in the amount field and entering the correct figure. Note –Differences here should be verified as these are the estimates the estimate or expected.
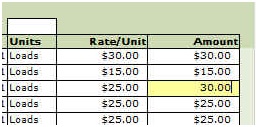
- Note – If all the amounts on tickets for a particular job or job line are incorrect there is an option to correct them all at once instead of individually. See the help file Updating Rates on a Job Line.
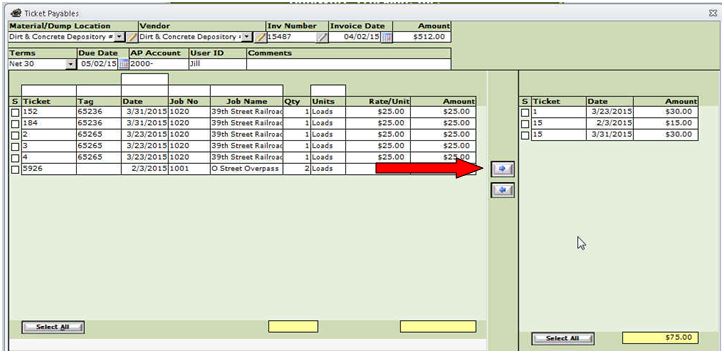
- Once you have selected and verified the amounts of a batch of tickets use the arrow button to move them over to the “verified” side of the screen. You can move the tickets over in as many batches as you like. For instance the vendor invoice contains tickets from multiple jobs and you prefer to work with one job at a time. You can filter your results to that one job, select and verify those,move them to the verified side then re-filter the audit side to deliver results for the next job you want to work with. You can also move tickets back to the audit side by selecting them and using the opposite arrow.
- When the verified side of the screen matches your vendor invoice OR you have verified that the rates in your system are correct you are ready to create the ticket payable invoice. Select the Done button to proceed with creation. Note – The Select All button on the verified side of the screen is used to move all the tickets back over to the audit side,you do not need to select them again to create the payable.
- What’s this?
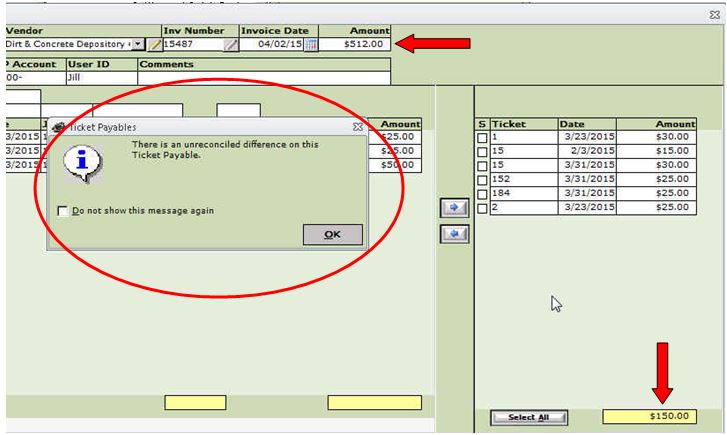
- When the ticket payable invoice is created the system checks to see if the amount of the vendor invoice and the amount of the verified tickets are in balance. If they are not, the above warning message will appear. This is not necessarily incorrect. It could be that the rates on the vendor invoice were incorrect. The ticket payable invoice and the subsequent AP bill will be created in the amount of the verified tickets NOT the amount entered for the vendor invoice.
- Back to the start screen.
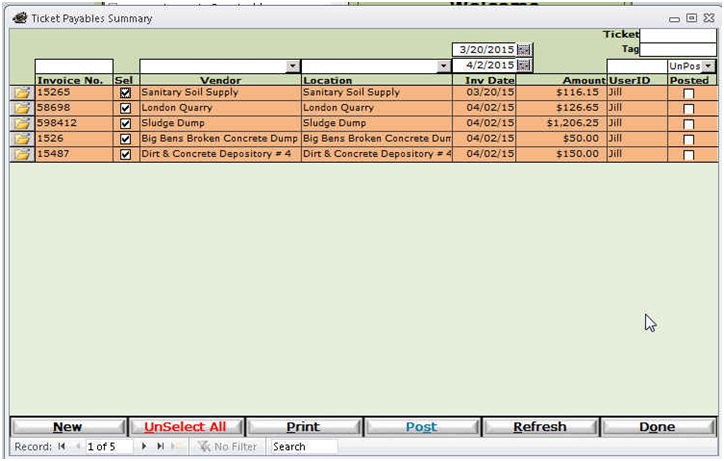
- Listed are all the ticket payables invoices that have been created. Those that are finalized and ready to post can be selected and posted using the POST button.
- Column filters help isolate those records you want to work with.
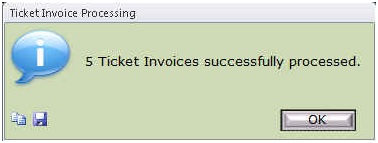
- After successful posting of the ticket payable your AP bills are posted and ready for payment.
Success!